

Written by Mo Kahn on
August 24, 2026


You've sketched a protagonist with a striking coat, a rival with three excellent expressions, and a mentor who still looks like someone from a different game. Then the route draft exposes the core problem. The protagonist is so vague that players can't read a role, while the supporting cast is so loud that nobody feels like they belong together.
Designing a visual novel character is less about producing attractive portraits and more about managing that tension. The player needs room for self-insertion, but the cast needs clear personalities, silhouettes, emotional reactions, and visual relationships. Art, dialogue, route structure, and AI-assisted iteration should therefore develop as one workflow. A design choice that looks harmless on a character sheet can create missing expressions, unnecessary costume variants, or a route that has no visual support.
A vague brief usually sounds promising: “I want a charming school protagonist with a mysterious friend group and dramatic romance routes.” It also gives an artist almost nothing to solve. Before drawing, decide what the character must communicate, to whom, and in what scene the player will first read them.
Suppose the protagonist is meant to be an approachable player viewpoint, but the first route depends on their ability to challenge an intimidating classmate. The design problem could be: How can this character feel open enough for self-insertion while still looking capable of making difficult choices? That question is more useful than a list of favorite hairstyles because it connects the sprite to the writing.
A practical visual novel workflow starts with three anchors:
Character-design guidance recommends defining the design problem and audience first, simplifying the character into traits, iterating sketches, and checking whether viewers can infer role and personality from the result. It also warns against making characters more complex than necessary, a point emphasized in this practical character-design introduction.
Write a one-sentence concept statement that includes the role, motif, signature trait, and intended player relationship. For example: “A cautious viewpoint protagonist who carries a repaired satchel and becomes visibly more assertive when someone else is treated unfairly.”
Now remove the name, backstory, and dialogue. Show the concept to someone who hasn't read your script and ask three questions:
If the answers are “student,” “neutral,” and “nothing,” don't add belts, jewelry, badges, and elaborate patterns. Change the motif or signature trait instead. A restrained design can still carry strong narrative potential when its few signals are intentional.
Practical rule: If the character needs an explanation before the viewer can identify their role, the design is carrying too little readable information or too many competing details.
This constraint also protects production. One clear motif can guide costume variants, expressions, route events, and prompt wording. It gives the artist a stable decision filter. If a new detail doesn't reinforce the role, mood, or motif, it probably belongs in the notebook rather than the first sprite sheet.
A protagonist and a supporting character shouldn't solve the same visual problem. The protagonist needs enough definition to feel like a person, but enough openness for the player to inhabit their decisions. Supporting characters can carry stronger silhouettes, verbal habits, colors, and gestures because their job includes creating contrast around the viewpoint.
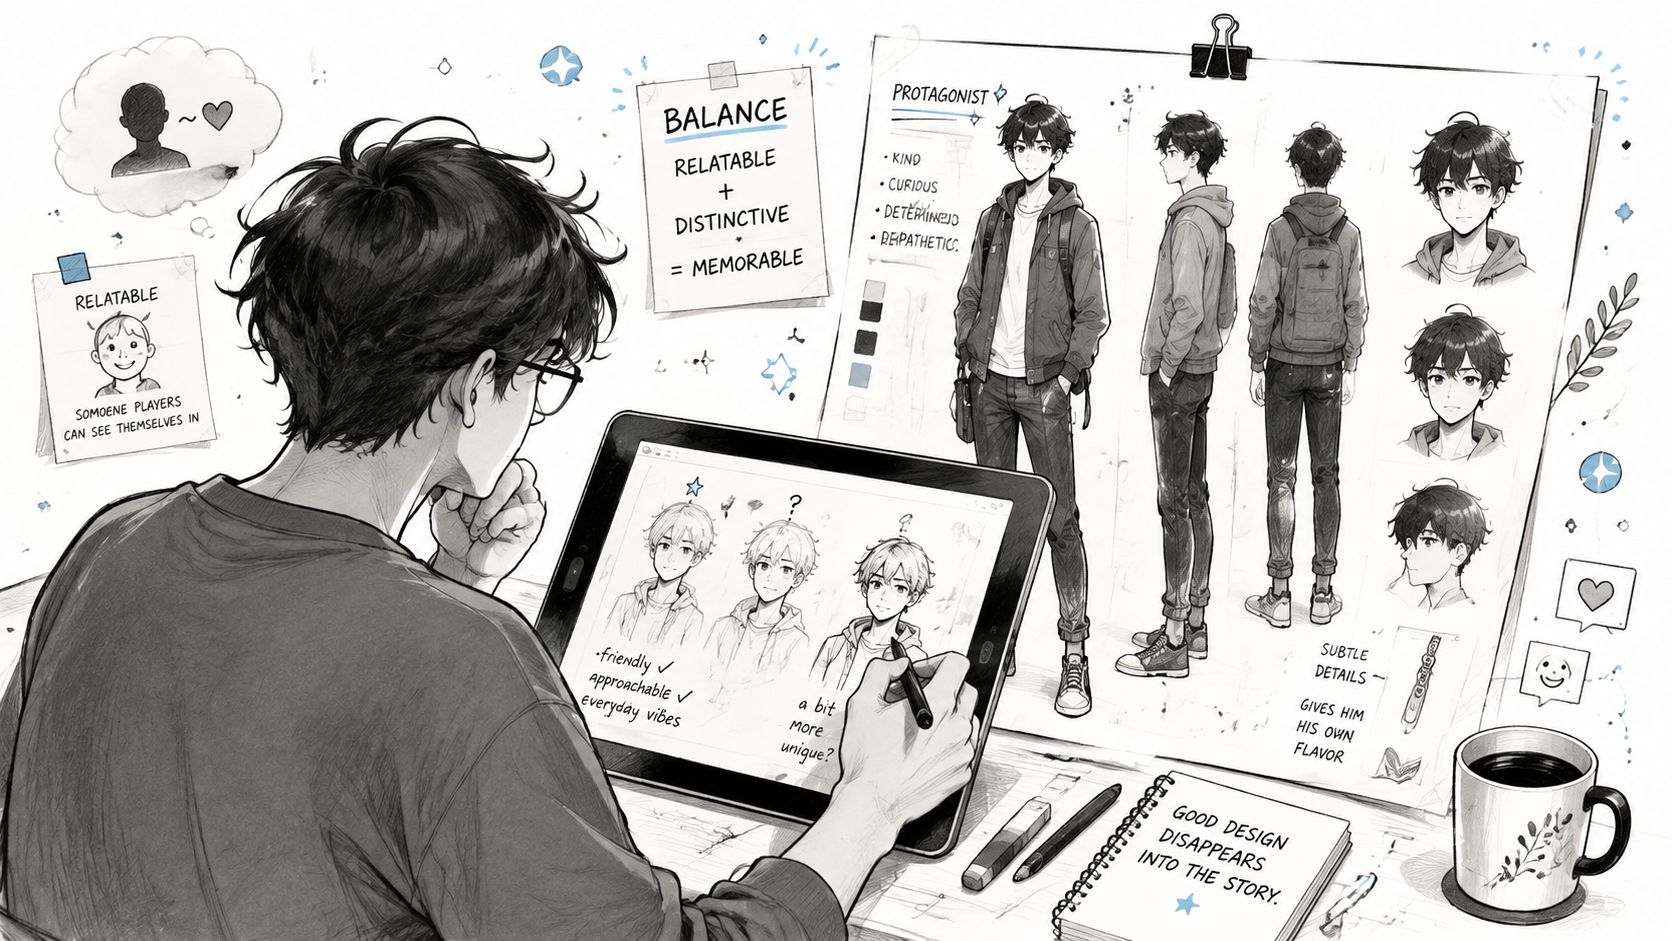
Start with role and audience, then move through visual decisions in a fixed order. Defining these choices before drawing prevents attractive details from taking over the concept.
Write a short role card for every major character. Include what they want, what they hide, how they behave under pressure, and what visual feature separates them from the rest of the cast. Don't reduce the cast to good and bad. Characters can contrast through confidence, social status, emotional openness, physicality, or attitude toward the protagonist.
Shared conventions help players read a cast quickly. Clothes, hairstyles, accessories, posture, and demeanor all communicate information, but they work best relationally. A reserved protagonist in a plain, balanced silhouette may stand beside a rival with sharp angles and rigid posture, while a mentor uses softer shapes and a more settled stance. None of those characters needs a villain costume.
Use mood references before anatomy studies. Gather images that communicate lighting, posture, fabric, environment, and emotional temperature, then choose references that reinforce the role rather than merely matching a favorite aesthetic. A polished style applied to the wrong role still produces a confusing character.
A character concept art generator can help you explore broad visual directions, but treat generated images as exploration rather than approval. Your approved design needs a stable role, motif, proportions, and expression logic.
Place the characters in a simple lineup at the size they'll occupy during dialogue. Check the following:
The protagonist doesn't need to be blank. A blank-slate lead often becomes invisible because the player has no visual or behavioral handle for identification. Give the lead a readable baseline, then let choices, dialogue, and route consequences reveal stronger personal qualities over time.
Supporting characters should also avoid becoming collections of archetype labels. A sharp-tongued rival becomes memorable when their visual severity conflicts with a private act of care. That contradiction belongs in the route, not only in a profile sheet.
A character portrait can look excellent at full size and fail completely during a dialogue scene. Visual novel sprites commonly use layered transparent PNG images displayed over backgrounds, so the player reads the character beside text, interface elements, and other sprites. Design for that composite context from the beginning.
A commercial visual novel commonly gives a character one base body design and roughly 8 to 30 expression variations, according to VNPaths' sprite production guide. The same guide identifies 1280×720 and 1920×1080 as common target resolutions, with sprites often prepared at 720px, 1080px, or twice those heights for high-DPI displays before scaling down. These figures aren't a command to produce every possible state. They're a reminder to plan a manageable base asset and a deliberate expression library.
Finish the neutral sprite first. Check its proportions, line weight, costume seams, hand placement, transparency, and position relative to the dialogue box. A neutral state exposes structural problems that a dramatic expression can hide.
Then separate facial components wherever your engine and art workflow support it. Eyebrows, eyes, and mouths can be combined instead of redrawn for every mood. In the documented Senpai Game system, mouth states such as grinning, frowning, and neutral each include closed and open variants with different tooth visibility, allowing a limited collection of parts to produce many outcomes. The approach is described in this breakdown of modular facial expressions.
Plan expressions by story function:
Avoid designing expressions as interchangeable stickers. The rival's smile might be controlled and narrow, while the protagonist's smile changes the eyes and posture. Personality should survive the swap between states.
Approve one reference sprite before generating or drawing a large expression set. Save the exact palette, hairstyle, eye shape, clothing construction, proportions, accessory placement, and line treatment. AI-assisted pipelines especially need this reference lock because the same trait can change across prompts or poses, producing continuity errors in a single scene.
If you're adapting the workflow for a 3D or hybrid project, these low poly character tips for Unity and offer useful context on simplifying forms without losing recognition. The principle carries into 2D work: simplify deliberately, not accidentally.
For prompt-based iteration, preserve a structured description rather than rewriting the character from memory. Guidance on repeatable prompt construction is available in this guide to writing AI prompts. Keep the design bible beside the asset folder, and reject any result that changes a defining trait just because the new variation looks attractive.
A route outline should create an asset list. If it doesn't, the writing and art teams are probably describing mood instead of staging events.
Take a simple route beat: the protagonist confronts a guarded friend after discovering that the friend sabotaged a school performance. The scene may require a neutral entrance, a defensive pose, a narrowed-eye state, an angry response, a moment of shame, and a final softened expression. The route has now told you what to produce. It has also shown you which states need to be reusable elsewhere.
Build a beat sheet with four columns:
| Narrative beat | Character need | Visual state | Production decision |
|---|---|---|---|
| The accusation begins | The friend needs controlled defensiveness | Guarded eyes, closed mouth | Reuse the neutral body pose |
| The truth emerges | The friend loses composure | Alarm or hurt | Add one high-value expression |
| The protagonist chooses empathy | Both characters need emotional release | Softer eyes, lowered tension | Use a transition rather than a new costume |
| The route branches | Each choice needs a readable response | Acceptance or rejection | Flag states for testing |
This method prevents overproduction. A route may suggest five costume changes, but only one may affect the player's understanding of the relationship. Conversely, a quiet scene may need several facial transitions because the drama lives in hesitation rather than action.
Engine structure matters here. Monogatari requires characters to be defined in the game configuration before display, and each definition can include multiple sprites for expressions or poses. Its character-sprite system supports showing a character with a chosen expression, position, and animation, as documented in the Monogatari character sprite reference. Similar requirements appear in other engines, even when the command names differ.
Don't use a protagonist's restrained personality as an excuse for static writing. Give the player choices that expose different interpretations of the same visual baseline. A quiet lead can choose to investigate, comfort, withdraw, or confront. The sprite may remain recognizable while the dialogue and route consequences define the character more sharply.
Supporting characters need stronger reaction rules because they provide the emotional landmarks around those choices. Write down what each one does when afraid, embarrassed, contradicted, or relieved. Then match those behaviors to expression components, pose changes, and scene timing.
A useful production review asks whether every major emotional beat has a visual answer. If the script contains a turning point but the character remains on the same neutral sprite, either the writing needs a quieter treatment or the asset plan is incomplete.
A route can lose its identity when every new AI pass changes the protagonist's face or gives the supporting cast the same visual energy. Treat generation as a controlled iteration system. The prompt should define the character's role, fixed traits, visual language, pose, emotional state, and asset purpose. Change one variable at a time, or you will not know whether a stronger result came from the concept or from random variation.
starryai generates custom characters from text descriptions and supports anime-style character and scene generation. Use it beside sketches, reference boards, and manual cleanup. It is useful for comparing motif directions before committing to production, but the approved design still needs to serve route readability and engine constraints.
Write a fixed prefix for traits that must remain unchanged, then edit only the scene-specific portion. These templates are starting points, not finished prompts:
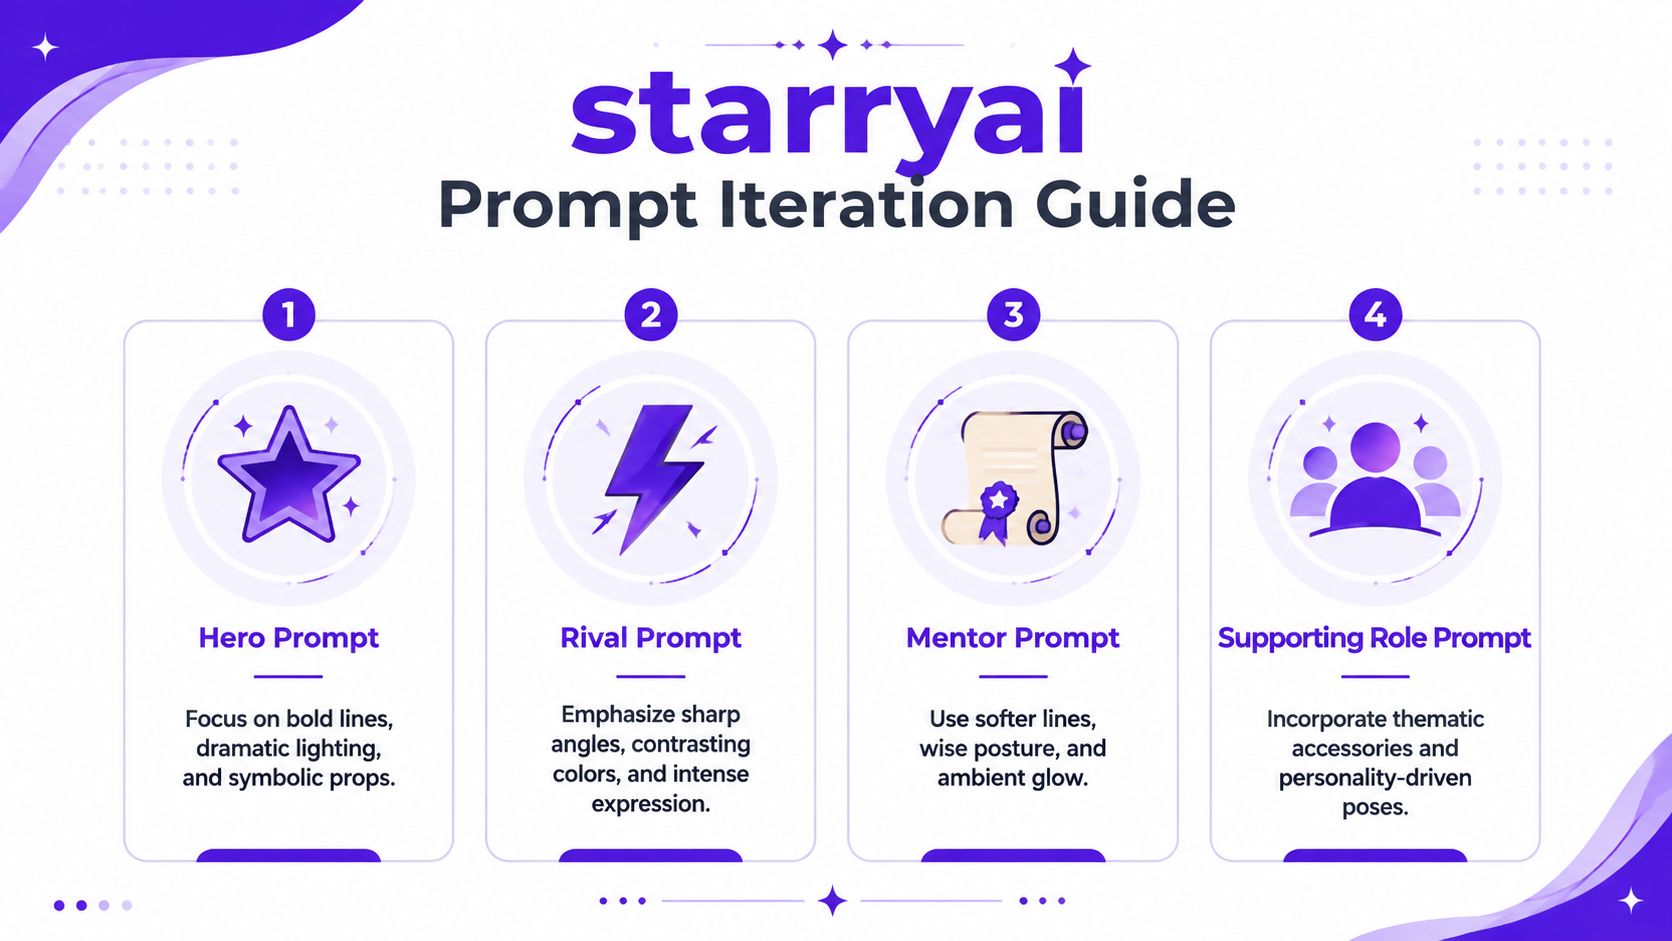
Start with broad concept options. After one result establishes the approved hairstyle, clothing construction, motif, and proportions, use it as the reference and stop rewriting foundational traits. Reference uploads and a guide to maintaining visual consistency across prompts can help preserve identity, but neither replaces review. Check hands, accessories, facial structure, costume seams, and the silhouette at dialogue scale.
Use a short style-lock checklist:
The protagonist may stay visually open enough for player identification, while rivals, mentors, and love interests need stronger silhouettes, gestures, and reaction patterns. Prompt each supporting character for those personality signals, not just for different hair and clothing.
Stop generating once the baseline works. A long series of attractive variants can introduce a different face, costume, or motif in every pass. Approve one reference, document its fixed traits, and change only the variable required by the scene.
The strongest AI-assisted workflow remains editorial. Let the tool widen exploration, then let the character brief, route requirements, and engine constraints narrow the result.
The most damaging mistakes aren't always dramatic. They're small inconsistencies that accumulate until the player stops trusting the screen.
A character with layered jewelry, intricate fabric patterns, multiple motifs, and highly specific props may look rich in a full illustration. At dialogue scale, those details can merge into noise and make expressions harder to read. The practical fix is to preserve one dominant motif and one signature trait, then move secondary detail into event art or close-ups.
Generic protagonist design creates the opposite problem. A lead with no posture, preferences, visual hook, or reaction pattern may leave room for self-insertion, but they can also feel absent from their own route. Define a baseline personality and readable silhouette, then let player choices expand the character rather than starting from emptiness.
Inconsistent expression construction breaks immersion quickly. If the eyes change shape, the mouth drifts across the face, or an accessory disappears between states, the player notices the production error instead of the emotional beat. Modular components and a locked reference reduce that risk.
A character can also be correct on paper and flat on screen. “Confident rival” means little until confidence appears through posture, timing, gaze, and the contrast between public control and private vulnerability. Test the sprite in an actual dialogue scene before approving the sheet.
A finished character package isn't a folder of attractive PNGs. It's a small production system that connects the design brief to route logic, engine commands, naming conventions, and playtest feedback.
Start with a clean folder structure. Keep the approved reference separate from working variations, and separate base sprites, facial components, poses, outfits, and export-ready files. Use names that describe both the character and state, such as rival_base_neutral, rival_face_guarded, or rival_pose_defiant. The exact convention can vary, but ambiguity can't.
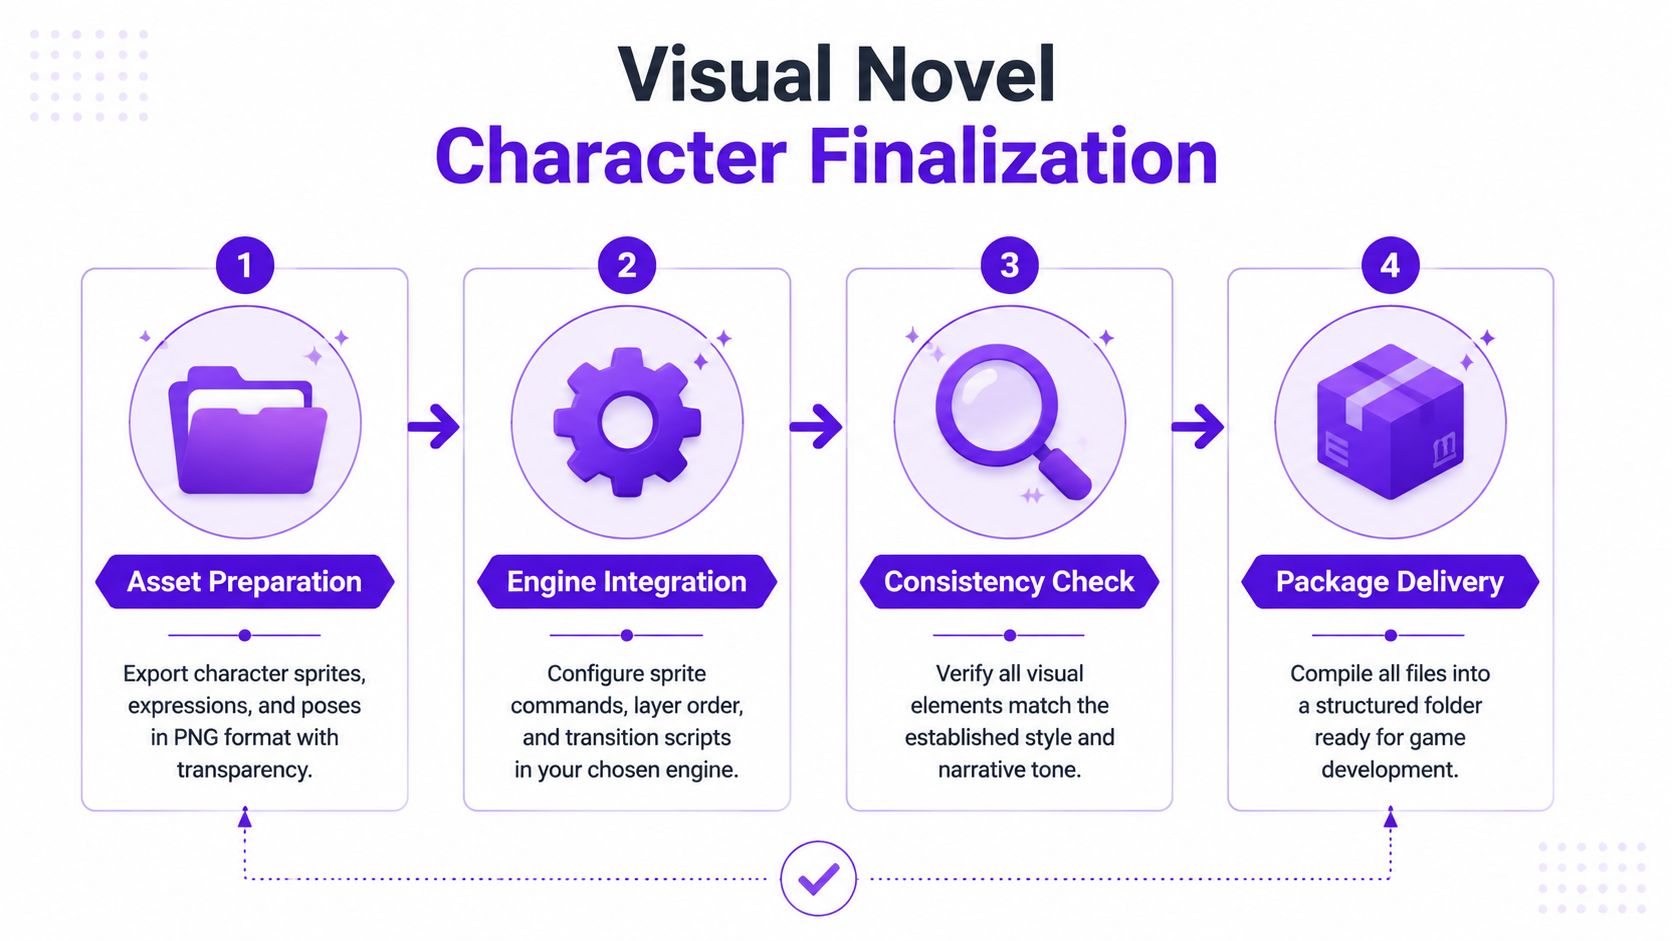
Export transparent PNGs with consistent canvas placement so characters don't jump when their expressions change. Preserve the same anchor point for every state, and check that semi-transparent edges don't produce halos against your intended backgrounds. If you use layered facial parts, document the layer order and the combinations that have passed review.
Define every character before calling them in a scene. Configure the available sprites or components, then test commands for display, movement, replacement, and transitions. Monogatari's documented workflow illustrates why expression-specific sprite management belongs in the core implementation rather than being treated as a cosmetic afterthought.
Run a route from its first appearance through its major branch points. Check whether the protagonist remains readable beside the supporting cast, whether emotional changes happen at the right line, and whether a reused expression still fits the new context. Test backgrounds with different brightness levels because a palette that works on one scene can lose contrast elsewhere.
Keep a simple issue log with the asset name, scene, problem, and fix. Version the approved files before making revisions, particularly after playtesting. When a player says a character feels “off,” ask whether the issue is silhouette, dialogue, expression timing, route motivation, or continuity. That answer determines whether you need new art, a script adjustment, or better integration.
Use this final checklist before calling the character complete:
A complete first route teaches you more than an enormous character bible. Build the smallest coherent package, put it in the engine, play it beside the dialogue, and revise the specific point where readability fails.
starryai lets you turn text descriptions into character concepts and anime-style visuals for exploration, reference development, and visual novel planning. Visit starryai to iterate on a consistent character direction before you commit the final sprites and route assets.


.svg)