

Written by Mo Kahn on
July 22, 2026


You've probably tried this already. You upload a selfie, tap an anime effect, and get something that looks polished for a second but not really like you. The face shape drifts, the eyes become generic, the hair loses its character, and the result feels closer to a stock avatar than a real sketch of anime built from your features.
That gap matters if you're making TikTok content, character art for a book, profile graphics for a game, or merch for a small shop. You don't want a random anime person. You want your face, your pose, your mood, or your original character concept, translated into a style that still feels intentional. The most reliable way to get there isn't pure hand drawing or a one-tap AI effect. It's a hybrid workflow that uses AI for speed and drawing fundamentals for control.
The biggest frustration in this space isn't lack of tools. It's lack of translation. Most tutorials still teach generic anime faces, default hairstyles, and broad character archetypes, while creators are trying to convert a selfie, a friend's portrait, or a very specific original character into something that still reads as personal. That mismatch is real. Most "anime sketch" content focuses on generic character templates and misses the problem of adapting real-life features into authentic anime sketches, and 72% of beginner artists struggle with that translation due to a lack of references.
A filter flattens decisions that should stay visible. It tends to average the jawline, simplify hair into decorative shapes, and replace subtle facial asymmetry with a formula. That's fine for novelty posts. It's weak for character branding.
Practical rule: If the result could belong to anyone, it won't feel like your character.
The hybrid method works because it splits the job correctly. AI handles exploration, fast variation, and mood. Manual refinement handles likeness, proportion, expression, and the small choices that make a sketch of anime feel authored instead of automated.
That matters even more for social platforms. A TikTok avatar or carousel cover has to communicate instantly. Viewers notice when the image has a real point of view. Indie authors notice it too when they're trying to keep a lead character visually consistent across a cover concept, teaser art, and promo graphics.
What works is using AI as a rough visual ideation partner, then pulling the result back into a drawing app and correcting the parts that carry identity.
Anime isn't one look. If your prompt only says “anime girl” or “anime boy,” you're asking the model to fill in too many blanks. Strong results start when you decide what kind of visual language you want, and why.

Anime has range because the medium has range. Its roots go back to 1917, and it changed dramatically in the 1960s under Osamu Tezuka, whose work helped establish serialized TV storytelling. That evolution fed the broader visual diversity associated with the 1980s golden age and the international hits of the 1990s (anime history overview). That history matters because modern anime aesthetics weren't built from one formula. They came from decades of different storytelling needs.
Think less about labels and more about what the viewer should feel.
Shonen works when you want energy. Shapes are sharper, poses push outward, and the silhouette needs to read fast. This suits action thumbnails, gaming avatars, and dramatic OC reveals.
Shojo leans into emotion and softness. Eyes carry more of the performance. Hair, lashes, and line rhythm often do more expressive work than armor or props. It suits romance edits, character posters, and personal profile art.
Chibi is useful when the goal is charm over anatomy. It's ideal for stickers, reaction images, and merch where readability at a small size matters more than realism.
Ghibli-esque is less about copying any one film and more about painterly warmth, believable gesture, and restrained whimsy. It fits story-driven character portraits and quieter scenes.
A style choice is also a communication choice. If the emotion is wrong, the rendering quality won't save it.
If you want a helpful parallel outside anime, look at how illustrators build mood through line, silhouette, and clothing emphasis in fashion drawing for designers. The medium is different, but the principle is the same. Style only looks intentional when it supports the character's role.
Creators often pick a style based on what they like, not what the image needs to do. That causes friction later.
A quick way to decide:
A useful test is whether the same aesthetic still works when cropped hard. If it collapses without the full scene, the style may be too dependent on atmosphere and not strong enough in form.
Prompting gets easier when you stop writing sentences and start building components. The strongest prompts for a sketch of anime usually combine subject, pose, framing, visual cues, and rendering instructions. When any one of those is vague, the output drifts.
One practical option is starryai's AI anime generator, which supports anime image creation from text and gives access to over 1,000 style presets, including anime, cyberpunk, and watercolor (style preset reference). That matters because broad style categories often produce broad results. More specific presets give you a tighter starting point.
Start with the character identity, then narrow the shot.
A useful order looks like this:
Subject
Specify who the person is. “Teen girl” is weak. “Short-haired violinist with tired eyes and a school blazer” gives the model shape, attitude, and costume information.
Pose or action
“Standing” doesn't do much. “Turning over one shoulder” or “holding a phone near the chest” creates gesture.
Framing
Decide whether you want a headshot, bust, waist-up, or full-body sketch. Cropping changes how much anatomy the model needs to solve.
Style direction
Ask for “clean pencil anime sketch,” “shojo linework,” or “dynamic shonen manga rough.” The aesthetic choices from the earlier section inform these requests.
Detail controls
Mention features that must survive stylization. Freckles, bangs, square jaw, round glasses, wide nose bridge, or a specific hoodie can keep the image tied to a real person.
Don't stuff every idea into one line. Strong prompts narrow the image. Weak prompts compete with themselves.
If you're working from a selfie or rough doodle, image-guided editing usually beats text-only generation because the model has a concrete face shape and placement to respond to. That's the missing step in many tutorials. A real reference image gives the sketch something to preserve.
| Goal | Prompt Template Example |
|---|---|
| Selfie to anime portrait | “Anime pencil sketch portrait of a young woman based on a selfie, soft shojo linework, shoulder-length wavy hair, gentle smile, large expressive eyes, clean face proportions, bust shot, white background” |
| Strong action character | “Dynamic shonen anime sketch of a male fighter mid-turn, spiky hair, intense eyebrows, open jacket, bold linework, dramatic pose, three-quarter view, rough manga pencil texture” |
| Cute avatar | “Chibi anime sketch of a gamer with headphones, oversized hoodie, cheerful expression, simplified body proportions, clean outline, sticker-like composition, front-facing” |
| Book character concept | “Anime-style character concept sketch of a quiet mage, long coat, satchel, thoughtful expression, slim silhouette, full-body turnaround feel, pencil draft with refined line placement” |
| Social media profile image | “Anime sketch headshot of a creator with short curls and round glasses, direct eye contact, crisp lineart look, expressive eyebrows, simple background, centered composition” |
| Couple illustration | “Romantic shojo anime sketch of two friends leaning together, soft hair detail, delicate facial expressions, gentle pencil rendering, waist-up composition” |
What doesn't work is relying on “make it anime” as the whole brief. That tends to produce generic faces and decorative detail instead of real character design.
A generated image is a draft, not a finish. The faster you accept that, the better your results get. Most of the quality jump happens after generation, when you evaluate the drawing like an artist instead of treating it like a final render.
Here's the workflow at a glance.
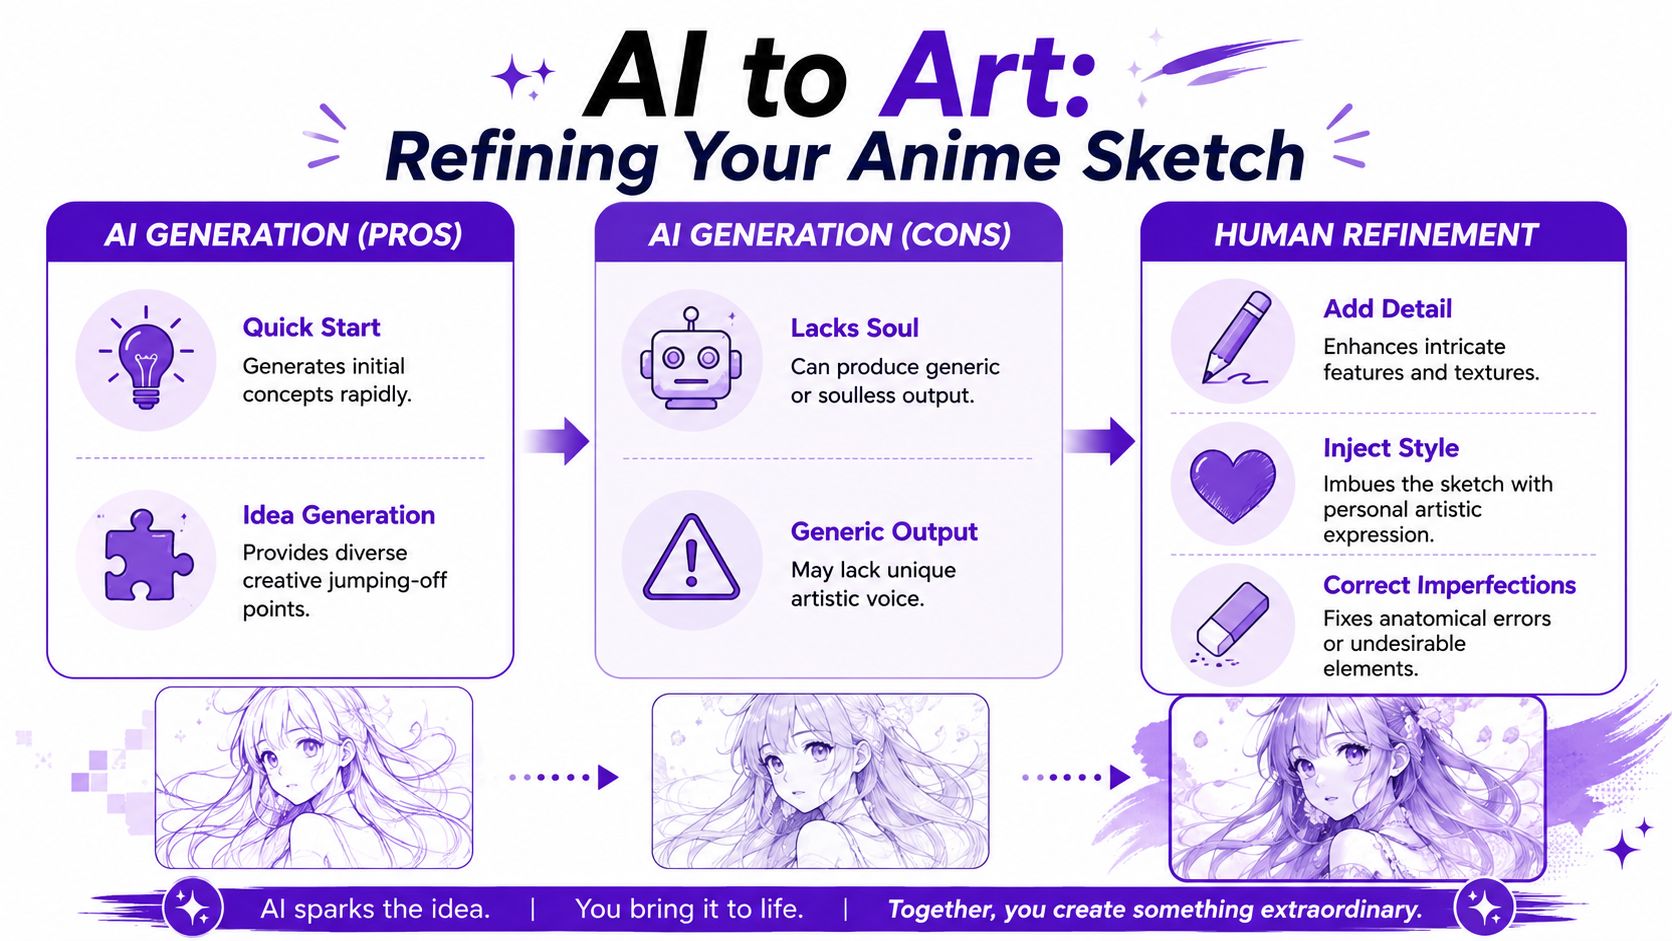
Import the image into any drawing app you like. Lower the opacity. Add a new layer. Then start checking structure before you redraw details. If you need a cleaner export before refining or printing, an AI image upscaler can help preserve edges before you paint over them.
The classic anime construction method still helps, even when the base image came from AI. Build the head with an oval, divide it into guide sections, add a downward-pointing triangle for the jaw and chin, and compare the generated face to that scaffold. For the body, use simple geometric forms such as triangles for the torso and hips, ovals for joints, and tapered cylinders for limbs.
That sounds basic because it is. Basic structure catches advanced-looking mistakes.
A major one is eye placement. Common pitfalls in amateur sketches include facial features drifting off the guide lines, and 40% of amateur sketches fail to align eyes correctly with the first horizontal guide line, which leads to distorted expressions. AI often makes that same error in a more subtle way. The face looks fine at first glance, but one eye sits higher, tilts differently, or carries a different scale.
The fastest way to improve an AI sketch is to stop zooming into eyelashes and start checking the center line.
A reliable correction pass:
Later in the process, this video gives a useful visual rhythm for AI-assisted anime art editing:
Hands and ears often come out uncertain. So do collars, overlapping hair strands, and accessories near the face. Don't redraw everything. Target the weak zones.
Use a separate cleanup layer for these passes:
What works is selective intervention. What fails is preserving every generated line out of loyalty to the first output.
A strong sketch can still disappear online if the framing is weak. Social media doesn't reward effort. It rewards instant readability. Merch does the same. If the design doesn't survive cropping, scaling, or printing, the drawing quality won't matter.
Most creators leave too much empty space because they're thinking like sketchbook artists, not publishers. A social post needs a focal point that reads immediately.
Three composition choices usually work better than a centered full-body figure on a blank field:
The rule of thirds helps, but only when it supports the focal point. If the eyes are the selling feature, place them where the viewer lands first. If the clothing design matters, pull back and let the silhouette breathe.
For platform formatting, it helps to think in versions instead of one master file. A reel cover, a static square post, and a banner crop all ask the art to do slightly different jobs. Keeping alternate crops saves time later. For a practical breakdown of visual sizing logic, aspect ratio guidance for social media is worth reviewing before export.
A polished sketch of anime becomes content only when it's framed for the feed it lives in.
Merch needs restraint. Fine line details that look elegant on a tablet can vanish on a shirt, mug, or sticker. Simplify before you export.
Use this checklist:
A useful habit is making one “screen version” and one “product version.” The screen version can keep lighter internal lines. The product version should usually have cleaner edges and fewer fragile details. That small split gives the artwork a better chance of looking intentional across platforms and physical items.
The most reliable workflow is simple. Start with a clear aesthetic direction, generate a base image from a focused prompt or a reference photo, and then redraw the critical areas by hand. That's how a sketch of anime keeps both speed and personality. AI gives you momentum. Drawing gives you authorship.
Yes, but only if you preserve the traits that define the face. Don't rely on hair color alone. Keep the jaw shape, nose structure, eye spacing, glasses, brows, and the expression pattern. Working from a selfie or a rough manual sketch usually gives better likeness than text alone.
No. Any app that supports layers, opacity control, and a basic brush is enough for cleanup. The point isn't software complexity. The point is being able to trace guides, compare proportions, and redraw weak areas cleanly.
That depends on use. Sketchy work feels more personal and can perform well for behind-the-scenes posts, character reveals, and mood boards. Cleaner line art tends to work better for profile graphics, covers, and product applications where clarity matters.
Commercial use depends on the terms of the tool you're using and the originality of your final work. Check the platform's current usage rules before listing art for sale, using it on client projects, or printing it on merchandise. If you're building a shop or a book asset pipeline, keep your prompts, drafts, and refinement files organized so your process stays consistent.
If you want a faster starting point for selfie-based character art, starryai can be part of that workflow. Use it to generate an initial anime direction from a prompt or reference image, then take the result into your drawing app and refine the features that make the character feel like yours.


.svg)