

Written by Mo Kahn on
September 2, 2026


You've got a sharp portrait, product photo, or AI-generated graphic on your screen. Then you crop it, run it through a quick resizer, and upload the result. In the preview, everything looks acceptable. Open the file on a second screen, zoom into the face, or let a social platform recompress it, and the edges turn soft, skin looks waxy, and a clean logo develops a faint colored fringe.
That failure usually comes from two separate decisions: changing the pixel grid without choosing a suitable interpolation method, then saving and resaving a lossy JPEG. Resizing can preserve the appearance of an image, but it can't restore information that the source no longer contains. The reliable approach is to start with the cleanest file available, resize for the actual destination, inspect the result at full size, and export only once.
The most frustrating resize failures often happen with images that looked perfect before the edit. A creator shoots a product against a clean background, crops away empty space, and enlarges the remaining image to fit a storefront banner. The product is still recognizable, but fine lettering loses its authority, straight edges look slightly melted, and tiny highlights become muddy patches.
Portraits fail in a similar way. A face can look smooth and attractive in a small browser preview, then reveal plastic-looking skin and smeared eyelashes when viewed at 100% zoom. The file hasn't just become “less sharp.” The resizer has replaced the original pixel relationships with estimated values, and the receiving platform may process those pixels again.
Practical rule: Judge the resized file at its intended display size and at 100% zoom. A small preview can hide halos, blur, and compression blocks.
Two problems appear repeatedly in day-to-day work. Downsampling without enough output sharpening can leave important edges dull, especially around type, hair, and product contours. Repeated JPEG recompression can add blockiness and ringing around high-contrast details, even when each individual save seemed harmless. JPEG remains useful for photographs, but repeated saving compounds its lossy processing, so exporting once from the highest-quality source is safer (Melotools' format guidance).
The right answer also depends on where the image will live. A social post, a book cover, an Etsy thumbnail, and a large print don't need the same pixel dimensions, sharpening, or file format. A basic resampler is often enough for a controlled reduction. A small image may benefit from AI reconstruction, but AI can also invent texture, lettering, or facial detail that was never captured. The rest of the workflow is about knowing which situation you're in before you press Export.
Digital resizing is a resampling problem. The software has to create a new pixel grid when you change the width or height, and it uses nearby pixels to estimate what belongs in the new positions. During downsampling, surrounding original pixels contribute weighted values to the smaller image. During upsampling, interpolation estimates values for pixels that weren't present in the source.
That difference makes shrinking and enlarging unequal. When you reduce an image, you discard information, but the remaining pixels can still preserve the broad structure, color relationships, and edges. When you enlarge it, the program must place color and brightness into spaces where no recorded measurement exists. Enlarging the smaller version later can't restore every detail from the original, because the discarded information is gone (the Journal of Engineering, Technology and Applied Computing study).
There's also a separate operation that confuses many users. Resizing without resampling changes the physical size or resolution field while leaving the actual pixel dimensions alone. Resampling changes the number of pixels themselves. Adobe's distinction, summarized in this explanation of resizing without resampling, matters because most visible quality changes come from altering the pixel data, not from changing a size field.
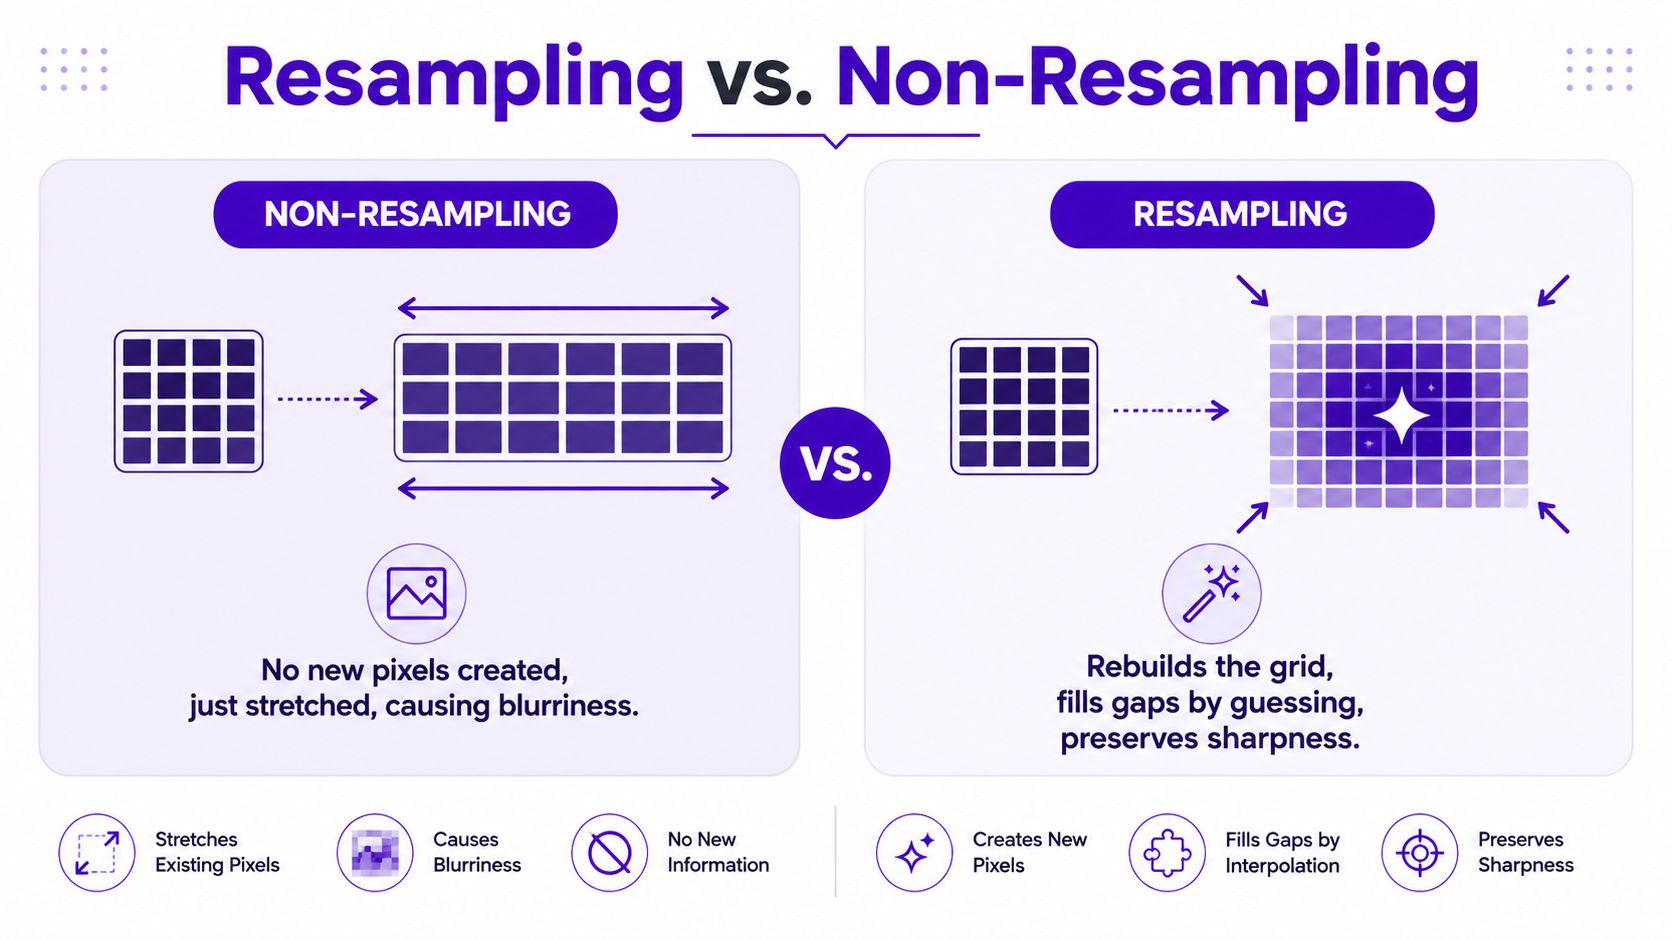
Interpolation is the rule used to estimate those new pixels. A nearest-neighbor method copies a nearby value, while smoother methods blend values across a wider neighborhood. That choice affects whether an image looks crisp, soft, clean, or surrounded by halos.
A practical way to think about it is a small painting. Shrinking it onto a postcard forces you to combine marks, but the important composition can survive. Projecting that same small painting onto a wall doesn't reveal brushstrokes that were never recorded. It only makes the gaps more obvious. Good software can manage the transition gracefully, but no ordinary resampling method can create truthful detail from nothing.
Desktop editors give you the control needed to make a resize repeatable. Photoshop, Affinity Photo, and GIMP all expose the important decisions, including dimensions, aspect ratio, resampling, preview, and export. The exact menu names vary, but the order should stay consistent.
Start with the raw file, original camera file, or highest-quality master. Don't resize an image that has already been resized for another platform. Keep a master TIFF or PNG when the project involves layers, transparency, typography, or a starryai output. Make a working copy, then decide whether you're cropping, resampling, or only changing the physical print dimensions.
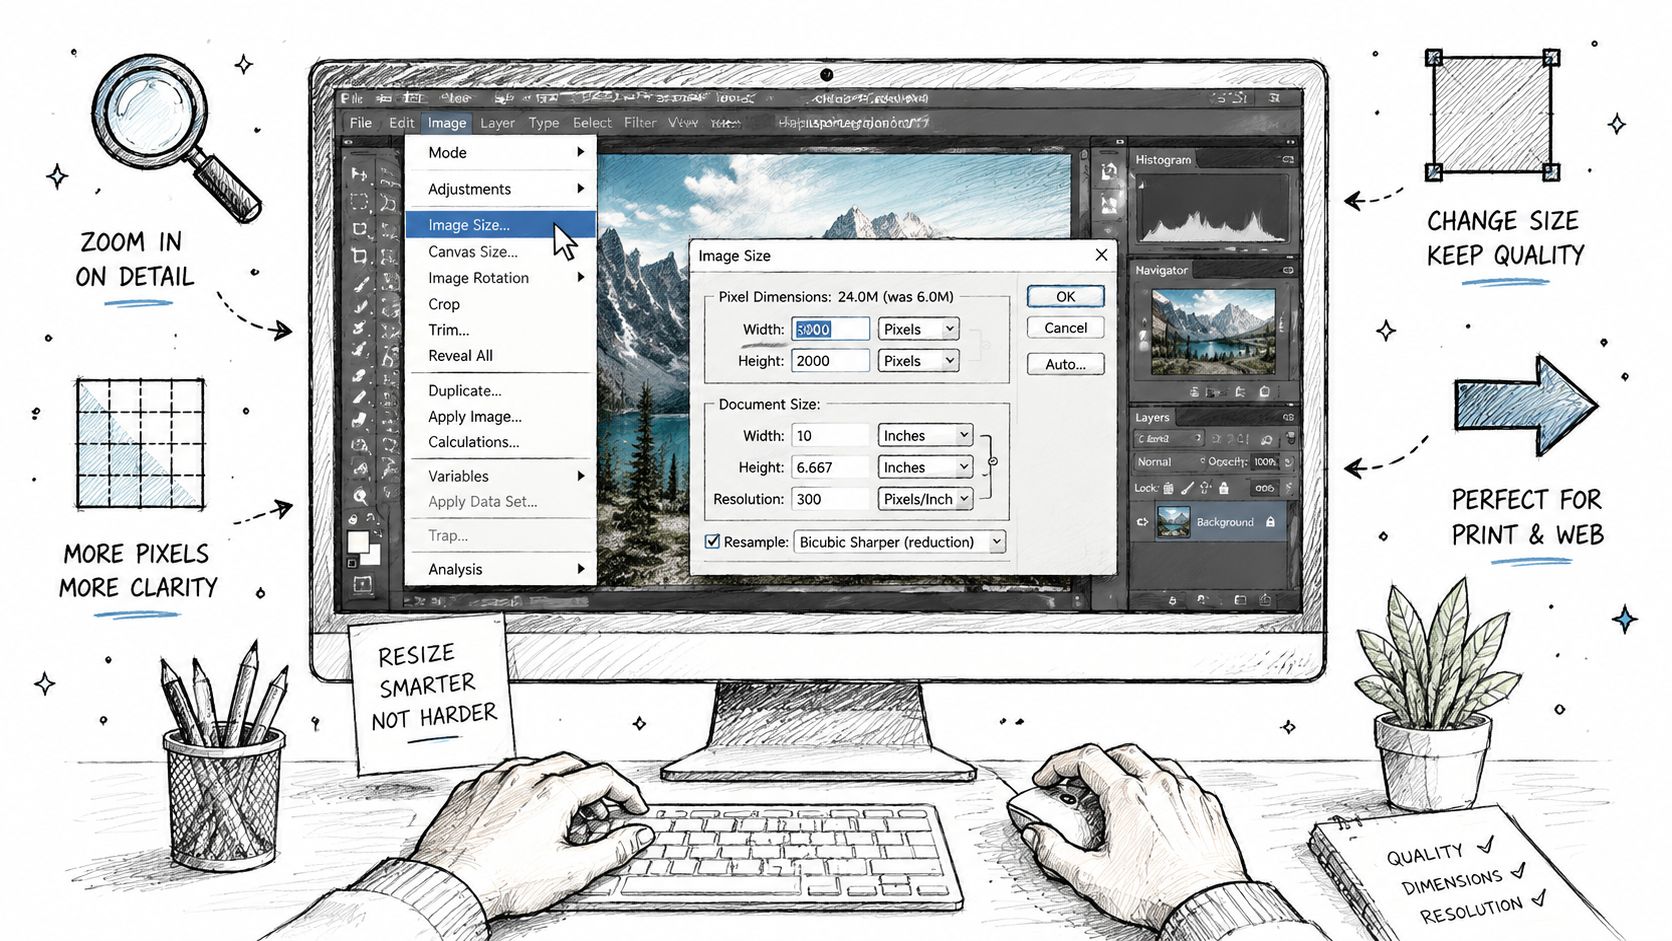
Open the image-size or resize dialog and enter the target width or height in pixels. Lock the aspect ratio before changing either value. If the destination needs a different shape, crop deliberately first. Don't release the proportions to force a portrait into a different format, because faces, packaging, and logos will stretch.
For enlargement, choose bicubic smoother above 150 percent as a practical desktop starting point. For general shrinking, use Lanczos when your application offers it. Reserve nearest neighbor for pixel art, hard-edged sprites, or deliberately grid-based graphics. After the resize, view the image at 100% and inspect text, eyelashes, product borders, and high-contrast lines.
If you regularly prepare product art, this guide to scaling images for e-commerce in Photoshop provides useful workflow context. For repeated asset preparation, keep the original untouched and use a batch workflow rather than opening and exporting each file from a compressed intermediate. starryai users can also review batch processing images when several assets need consistent treatment.
Export according to delivery, not habit. Use PNG or TIFF for transparency and print masters. For web JPEGs, use sRGB and quality 85–92. WebP is a strong web choice, and lossless WebP is appropriate when you want the cleanest social upload available from the editor. Keep starryai outputs as lossless PNG until you've decided whether the final destination requires JPEG, WebP, or a print format.
The video below demonstrates a desktop resizing workflow and gives you another way to see where the relevant controls sit.
The right interpolation depends on the job. A social-feed graphic can tolerate a slightly softer edge, while a book cover or large print needs controlled detail and clean type. Each filter balances speed, smoothness, edge definition, and artifact control differently. Comparative research has found bicubic approaches practical because they generally produce less error than bilinear and nearest-neighbor methods. A landmark resizing study described cubic interpolation as a useful compromise between sharpness and edge artifacts, while windowed sinc methods can introduce ringing and jagged edges (the SPIE paper abstract).
| Method | Speed | Sharpness | Best For | Watch Out For |
|---|---|---|---|---|
| Nearest neighbor | Very fast | Hard, blocky | Pixel art and UI mockups | Terrible for natural photographs |
| Bilinear | Fast | Smooth but soft | Quick previews and uncomplicated reductions | Fine detail can disappear |
| Bicubic | Moderate | Balanced and controlled | General-purpose photo resizing | Becomes visibly weak for aggressive enlargement |
| Lanczos | Moderate | Crisp, often high edge definition | Downscaling and many enlargement workflows | Can create ringing around strong contrast |
For a modest enlargement, bicubic is usually the safest starting point. One comparative study reported PSNR and SSIM values of 23.34/0.70 for nearest neighbor, 24.23/0.72 for bilinear, and 24.75/0.74 for bicubic, while a GAN-based method reached 25.22/0.79 (the IRJMETS comparison). The same source notes that bicubic quality drops sharply beyond 2×, as fine detail gives way to blur.
AI upscalers help when the source is too small for the intended display and perceived impact matters more than exact pixel history. For a social character illustration, they can rebuild plausible edges and texture so the subject reads at feed size. For a draft book cover, they may produce a usable visual when the original concept art is undersized. Tools such as Topaz Gigapixel, Real-ESRGAN, and the upscale function in starryai's image editor make that reconstruction possible.
The output remains a prediction, not a recovery of detail the camera recorded. That distinction matters for archival scans, technical diagrams, blurred faces, and product photography. AI can turn an unreadable label into convincing but incorrect lettering, or add texture to a surface that should stay smooth. A large print can look impressive from a distance while failing under close inspection.
Use this guide to AI image upscalers to compare that reconstruction process with ordinary interpolation. Stop when invented features could be mistaken for real ones. More pixels do not automatically make an image more trustworthy.
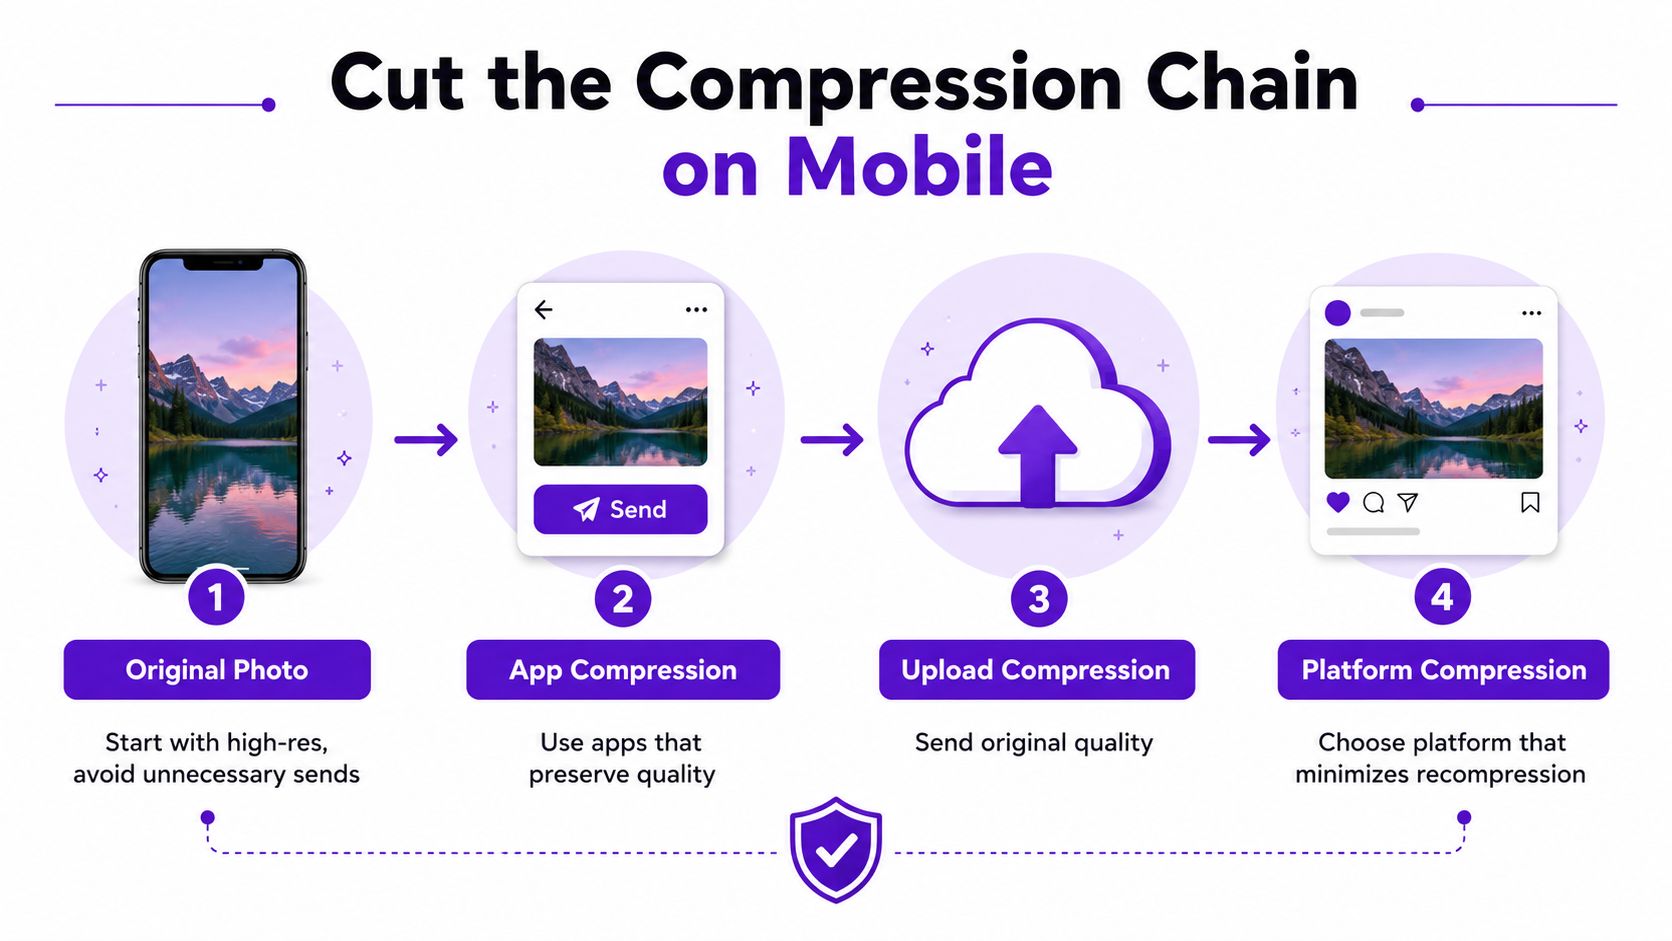
Mobile editing becomes risky when the same photo travels through several apps. A camera saves a source file, a messaging app compresses it, an editor exports another copy, and the destination platform processes it again. The cleanest workflow removes unnecessary handoffs.
On iPhone, begin with the original HEIC or ProRAW file in Photos. Crop to the final aspect ratio before resizing, because recropping after the resize throws away pixels you already preserved. Export once through the Share sheet to Files as a full-quality JPEG or PNG. Don't create a reduced copy just to move it to another device, then resize that copy again.
On Android, use Google Photos or Snapseed for the crop, dimensions, and final export. Save directly to Drive or the intended project folder. Keep the original beside the finished version so you can create a different crop later without starting from a compromised file.
For common mobile destinations, these working targets are practical:
For WhatsApp, send the original file as a Document when preserving the source matters. Sending it as a normal photo gives the app permission to optimize it before the recipient sees it. The platform may still process a displayed image, but bypassing an avoidable intermediate conversion gives you more control.
The right resize is defined by the receiving surface. A file prepared for a social feed has different needs from a book cover or a print viewed across a room. Match the pixel dimensions first, then choose color space, format, and sharpening for that destination.
| End Use | Resolution | Color Space | Format | Sharpen |
|---|---|---|---|---|
| Instagram, LinkedIn, Facebook feeds | 1080 wide, 1080x1350 portrait, 1080x566 landscape for Instagram | sRGB | JPEG, quality 85–90 | Light output sharpening |
| Etsy, Shopify, Amazon storefronts | Recommended long-edge size, commonly 2000–2700 px | sRGB | JPEG, quality 90 | Sharpen product edges, not skin |
| Book covers and paperback wraps | 300 dpi at final trim size, plus 0.125 inch bleed | sRGB for digital proofs, Adobe RGB or ProPhoto for print | TIFF or high-quality JPEG | Controlled sharpening after final dimensions |
| Large-format print above 24 inches | 150–200 dpi at final size can be suitable for typical viewing distances | Printer or color-managed workflow | TIFF or high-quality JPEG | Moderate, judged at viewing distance |
The social presets prioritize predictable platform handling. Export in sRGB, use the actual intended dimensions, and apply light sharpening only after the resize. Heavy sharpening may look energetic in your editor and turn into halos after recompression.
Storefront imagery needs a different kind of restraint. Product edges, packaging corners, and small marks should remain clear, but sharpening skin, fabric, or reflective surfaces too aggressively can create an artificial outline. JPEG is usually practical for photographs, while PNG is better when transparency or lossless output matters. WebP can provide strong web compression with good visual quality, but check the receiving service before committing to it (format recommendations from Melotools).
Book covers need attention to the physical layout, not just the front image. Build the cover at the final trim dimensions, include bleed, and keep text and spine elements positioned by the printer's template. For more detail on preparing files for physical output, use this guide to image resolution for printing.
Large-format work is often judged from normal viewing distance rather than with a nose against the paper. A well-composed source with clean edges can outperform an aggressively enlarged file that contains invented texture. For starryai-generated inputs, export the native-resolution PNG before resizing, then make the destination-specific copy from that master.
Keep this beside your monitor and follow it before trusting a resized file.
Start from the largest cleanest source you have, resize once, export once, and never resave a JPEG.
If you're creating an image from a prompt, selfie, or emoji and need a clean version for a social post, cover concept, avatar, or merch design, starryai offers image generation and editing tools that can fit into this quality-first workflow. Keep the lossless output as your master, then resize and export a delivery copy for the platform where it will appear.


.svg)