

Written by Mo Kahn on
July 22, 2026


You've got a character in your head already. Maybe it's the lead for a romance novel, a brooding elf for your campaign, or a selfie concept you want to turn into something worth posting. The problem usually isn't imagination. It's getting that idea out of your head and into an image that looks like the same person you pictured.
That gap is where many stall. They can describe the character, they can feel the vibe, but they can't draw, don't want to learn a full production workflow, and definitely don't want to spend hours wrestling with settings just to get one usable portrait. For quick content, social posts, book mockups, and profile art, that friction kills momentum fast.
A lightweight AI workflow changes that. If you can describe a face, a mood, and a style, you can make something usable today. And if you also sell products around your brand, it helps to think beyond the character itself and optimise your online shop with AI so the creative side and the storefront side support each other.
A lot of people searching how to make a character aren't starting from zero. They already know the energy they want. They know the character has tired eyes, an oversized jacket, and a look that says they've been through something. They just don't have the drawing skills to turn that into a clean visual.
That's why fast AI character workflows are so useful for non-artists. You can move from rough concept to shareable image without opening a sketchbook or learning anatomy. For social creators, that means a stylized portrait you can post today. For indie authors, it means cover direction before you hire a designer. For tabletop players, it means a face for the hero on your sheet instead of a placeholder image that never felt right.
The practical win is speed, but the main win is clarity. Once you see the character, you start making better decisions about wardrobe, pose, mood, and even backstory. A strong image often reveals what was still fuzzy in your concept.
Practical rule: Don't wait for a perfect design before generating anything. Generate early, react to what you see, then tighten the concept.
The creators who get good results quickly usually do one thing well. They stop treating character creation like a giant abstract task and start treating it like a sequence of small calls. Who is this person. What's the one thing people notice first. What mood should the image carry. What kind of visual world do they belong in.
That's the path for how to make a character with AI. Start with identity, lock the visual anchors, then turn that into a prompt that gives the model enough direction to stay on track.
A strong image starts before the prompt. If the concept is mushy, the output will be mushy too. Most bad character generations aren't caused by the tool. They come from vague source material.
Published fiction gives a useful clue here. In narrative fiction, 85% of published authors who use a standardized six-step profiling process covering role, basics, physical traits, emotional traits, past, and goals produce characters with higher reader engagement according to Jerry Jenkins on character profiling. You don't need a massive worksheet, but you do need enough specificity to make decisions.
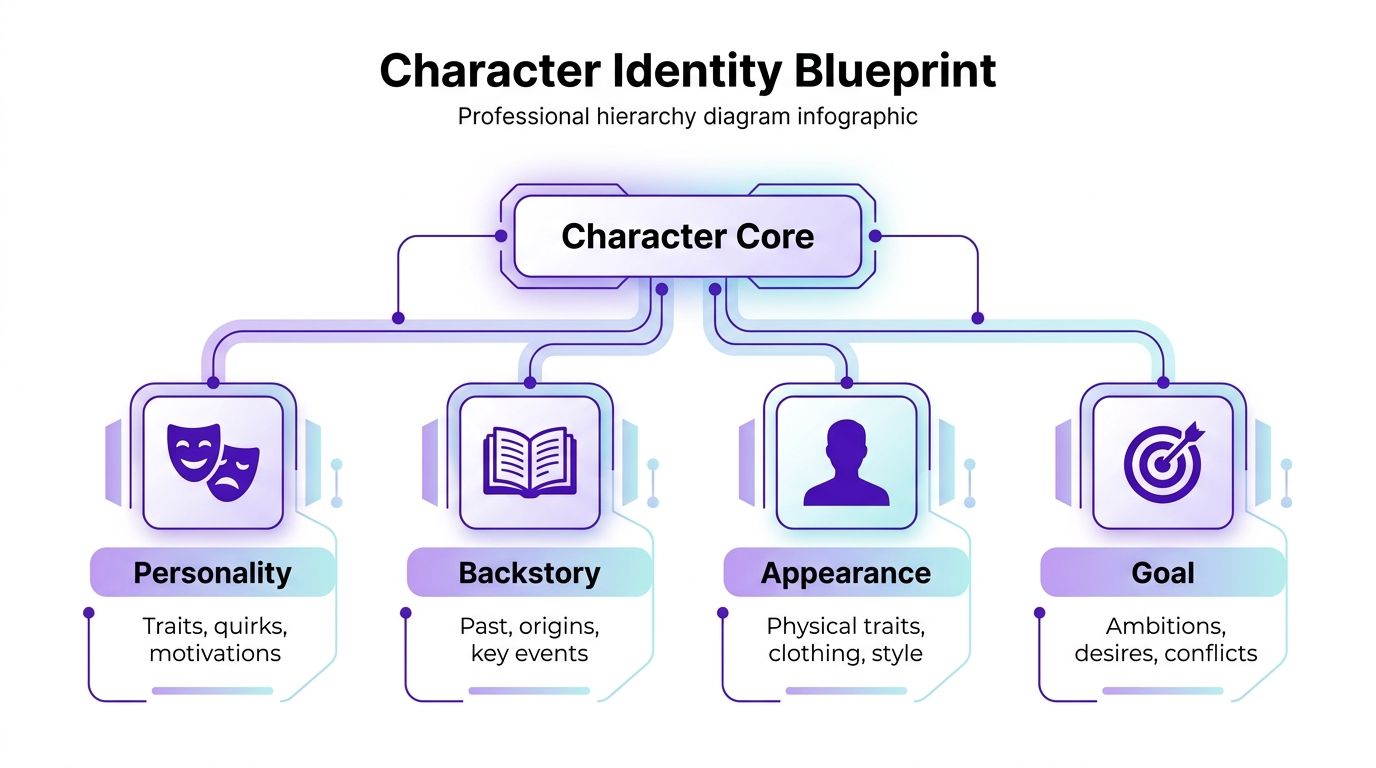
Keep it compact. For quick visual work, a mini character bible beats a bloated template you'll never finish.
Use these four anchors:
That's enough to shape a useful portrait. If you want more inspiration for concepting before you prompt, the character art ideas guide is a handy way to pressure-test your direction.
Not every detail belongs in your first prompt. A common mistake is dumping every fact into one wall of text. AI images respond better when the essentials are clear and memorable.
I'd prioritize details in this order:
The character should be recognizable even if you strip away the background.
That's why I don't start with lore-heavy paragraphs. I start with the features that survive every image. The old novelist habit of overbuilding can slow visual work down unless you trim it into image-ready cues. For game writers and worldbuilders, I also like browsing Gydel app articles because they show how mechanics, worldbuilding, and character intent can support each other without turning the process into homework.
If you're learning how to make a character for social posts or cover concepts, this identity pass is the part that saves the most time later. It gives you a stable center. Once that center is clear, the prompt becomes much easier to write.
Prompt writing isn't about sounding poetic. It's about being concrete in the right places. The system's own guidance is direct. “The more specific the prompt is, the better results you will receive”, as shown in this starryai prompt walkthrough on YouTube. That's the difference between getting “fantasy warrior” sludge and getting a character with a face, outfit, and mood you can use.
I use a simple build:
[Subject] + [Key Features] + [Art Style] + [Composition and Lighting]
That structure works because each part does a different job.
A useful prompt doesn't try to say everything. It chooses details that create a recognizable person.
Here's a rough example:
young elven ranger, sharp jawline, tired amber eyes, scar on left cheek, dark braided hair, weathered leather armor, silver earring, cinematic fantasy portrait, moody forest lighting, front-facing, detailed face, shallow depth of field
That's stronger than “elf warrior in forest” because it gives the image generator a face, a texture, and a shot choice.
If you want help drafting variations quickly, the character art prompt generator can help you turn a rough concept into more precise wording.
| Element | Description | Example |
|---|---|---|
| Subject | The character's identity or role | exiled prince, cyberpunk courier, witch librarian |
| Key Features | Facial traits, hair, clothing, accessories, expression | hooked nose, pale skin, cropped black hair, gold glasses, velvet coat |
| Art Style | The visual language you want | anime portrait, photorealistic, painterly fantasy |
| Composition & Lighting | Camera angle, framing, mood, light | front-facing close-up, soft window light, dramatic shadows |
Copy-paste template:
[character role or archetype], [face details], [hair], [signature clothing or accessory], [expression or mood], [art style], [framing], [lighting]
Generic prompts fail for one reason. They leave too many decisions open. The model fills the gaps with clichés.
A better workflow is to translate your mini character bible directly into prompt parts:
Here's a quick comparison.
Weak prompt
fantasy strongman portrait
Better prompt
battle-worn mercenary, broad shoulders, shaved head, broken nose, heavy brow, fur-lined armor, stern expression, dark painterly fantasy portrait, chest-up framing, cold directional light
The second prompt works because it narrows the field without overloading it.
Prompt habit: If a stranger read your prompt, could they sketch the face shape, outfit, and mood from words alone? If not, it's still too vague.
One more trade-off matters. Dense prompts can help, but cluttered prompts can fight themselves. Don't mix “soft romantic portrait,” “gritty realism,” “anime lineart,” and “editorial fashion” unless you want chaos. Pick one lane first. Then iterate.
That's the practical core of how to make a character in a text-to-image tool. Specific identity beats broad genre labels every time.
Style selection changes the same character more than most beginners expect. A prompt that reads well can still miss the mark if the aesthetic language is off.
A photoreal look pushes skin texture, camera feel, and believable light. An anime direction sharpens silhouette and expression. An Artstation-style fantasy treatment often leans dramatic, polished, and cover-friendly. None of these is automatically right. The right one depends on what the image needs to do after you generate it.
If the character is meant for social media, stylization often reads faster. Strong shape language and obvious mood cues survive scrolling better than subtle realism.
For a book cover concept, I usually prefer something cinematic and restrained. You want atmosphere, not visual noise. For an avatar, the face needs to stay legible at small size, so high-contrast features and cleaner framing matter more than decorative detail.
A reliable habit is to keep the prompt stable while changing only the style direction. That lets you see whether the issue is the wording or the rendering approach.
Use front-facing or near-front-facing portraits first. Expert AI artists note that detailed text prompts combined with consistent lighting and angle settings improve character success rates, with front-facing images and good lighting producing the most reliable results, as discussed in this character consistency video. If realism is your target, the realistic character creator guide is a useful reference for dialing in that look.
Most first outputs are drafts. Treat them that way. If the face is close but the styling is off, refine the styling. If the clothes work but the age feels wrong, rewrite the age cues. Don't throw away a nearly-right image because one element drifted.
What usually helps:
A short visual demo helps when you're trying to judge how much style shifts the output.
The app-based workflow many creators use is simple: prompt, style choice, generation, then variation. In tools such as starryai, that sequence is practical because you can test looks quickly without building a technical pipeline. The main skill is restraint. Keep your identity anchors fixed, and let the style change do the exploring.
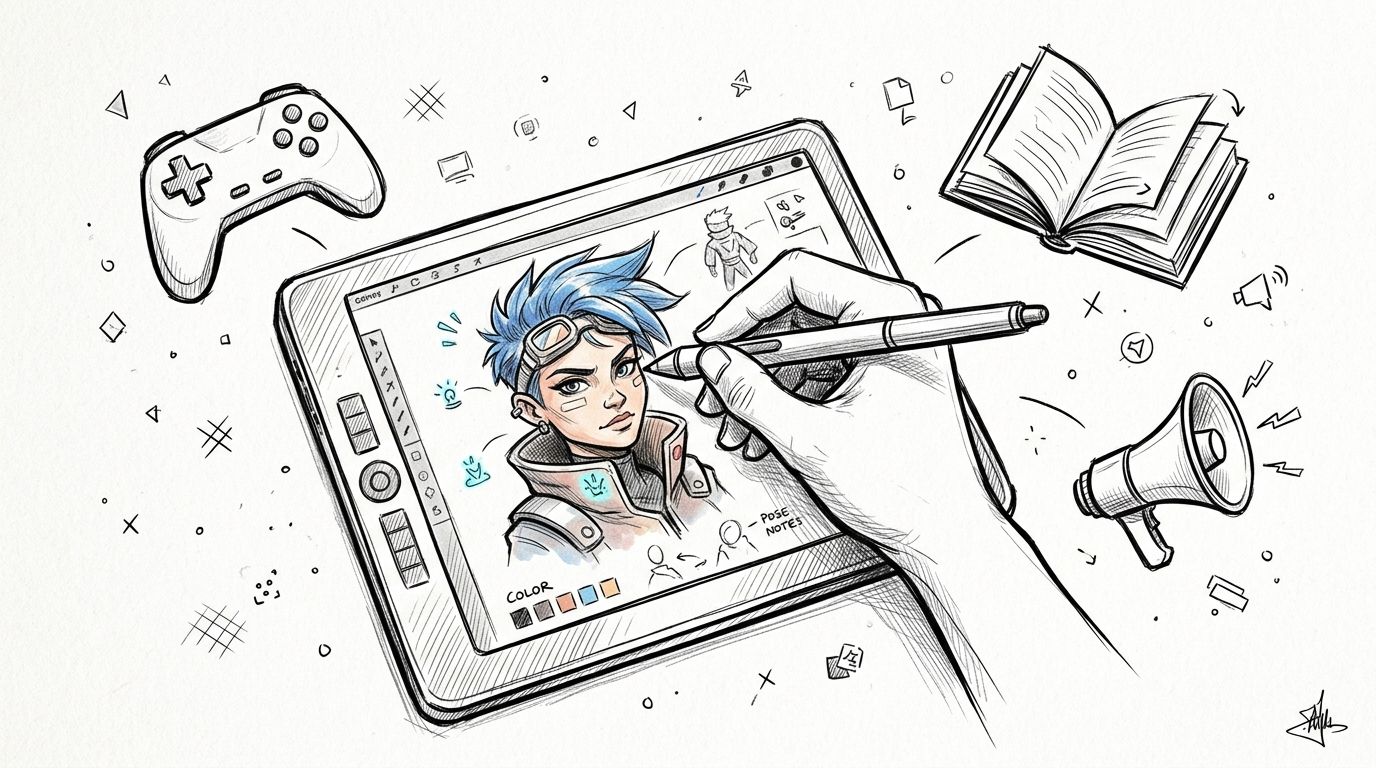
Theory helps, but character art gets easier once you've seen a few practical patterns. These are the ones I'd use for fast content, concept art, and profile-ready images.
This workflow starts with a recognizable version of you, then pushes it into a stronger aesthetic.
Starting point
Take a clear portrait with even lighting. Neutral expression is fine. The goal is a readable face, not a dramatic pose.
Prompt direction
selfie-inspired character, soft sharp features, glossy lips, layered dark hair, silver jewelry, oversized streetwear jacket, dreamy cinematic portrait, cool-toned lighting, front-facing close-up
Style choice
Pick a style that keeps skin readable and lets accessories stand out.
Final image goal
A postable portrait that still feels like you, but cleaner, moodier, and more stylized.
What doesn't work here is overcostuming the image. If you pile on fantasy armor, neon cityscapes, and surreal effects, the selfie link disappears. For trend-based content, the best transformations preserve identity first and dramatize the aesthetic second.
For authors, the image usually isn't the final cover. It's a concept anchor. That changes how I prompt.
Start with the protagonist's emotional read, not the full plot summary. If your lead is haunted, don't bury that under five paragraphs of lore. Put it on the face.
Example prompt
young woman with tired eyes and a resolute expression, wavy auburn hair, high-collared black coat, antique pendant, faint scar near eyebrow, gothic portrait painting style, dramatic side light, dark blurred background
Style choice
Painterly, cinematic, or moody realism works well for cover ideation.
Final image goal
A portrait that a designer can use as tonal reference for pose, palette, and emotional temperature.
For book concepts, one strong portrait often helps more than a full-body scene packed with story details.
This is also where restraint matters. If every symbolic object from the novel appears in the image, it starts to feel like a collage instead of a lead character.
RPG characters benefit from one extra layer of thinking. Their stats can inform the design. In tabletop RPGs, a common stat method rolls four six-sided dice and removes the lowest value, resulting in a higher statistical average of 16.5 per attribute, which can help you think visually about strength, dexterity, or presence, as discussed in this DnD stat creation thread.
That doesn't mean you need to write numbers into the prompt. It means you can translate mechanics into appearance.
A high-STR character might read as thick wrists, heavy stance, visible muscle, broken nose, dented armor.
A high-DEX character might read as lean build, alert eyes, light gear, narrow silhouette, agile posture.
A high-CHA character might need symmetry, poise, immaculate clothing, and direct eye contact.
Example prompt
human rogue, lean athletic build, alert green eyes, short ash-brown hair, fitted leather armor, fingerless gloves, hidden dagger at belt, confident half-smile, dark fantasy portrait, three-quarter view, lantern light
Final image goal
An avatar that tells other players what kind of character this is before anyone reads the sheet.
For gamers, this is one of the fastest answers to how to make a character feel real. Build the visual from role and stats, not just species and outfit.
The hardest problem in AI character art isn't making one good image. It's making the same person again without their face drifting.
The consistency issue gets worse when you change angle, expression, or outfit too fast. A character who looked great in one portrait suddenly turns into a cousin in the next one. The fix is simple in principle. Lock a few essential identity traits and repeat them every time.
Pick a short list of traits that never change:
Then keep your lighting and framing stable while testing pose changes. If the identity falls apart, return to a closer angle and rebuild from there.
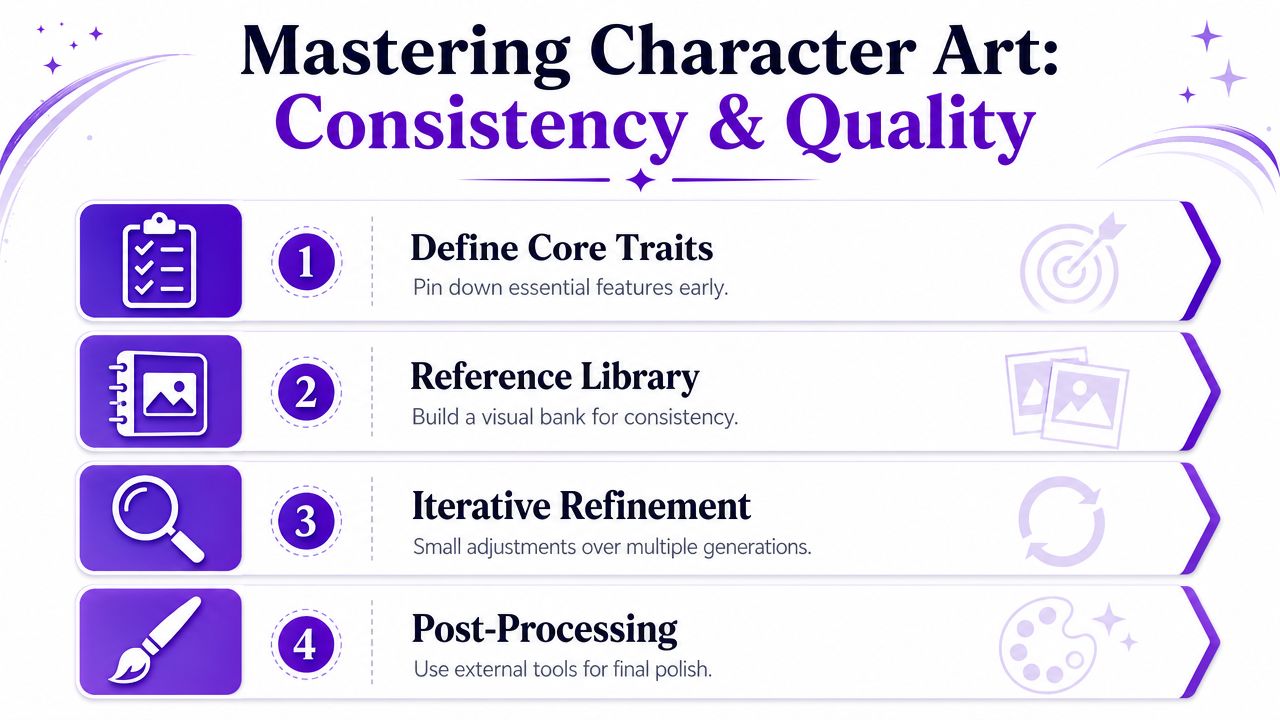
Small adjustments across multiple generations work better than asking for a dramatic pose, a new outfit, and a new mood all at once.
A simple reference folder also helps. Save your strongest outputs and compare every new generation against them. That catches drift quickly.
Once you have the image you want, don't treat export like an afterthought. For commercial-use finalization, the Enhance feature increases detail and resolution, but enhanced images are only stored for 7 days and expire if you don't download them in time, according to the starryai Enhance feature FAQ.
That deadline matters. If you've made a cover concept, merch graphic, or profile image you plan to reuse, download it immediately and organize it properly. I'd save the final image, the working prompt, and one text note describing the identity anchors. That turns one good generation into a repeatable asset instead of a lucky accident.
If you're ready to turn a rough idea into a polished visual, starryai gives you a simple way to build characters from text, selfies, and style choices without a technical setup. Start with one clear identity, generate a few focused variations, and save the prompt that gets closest to your character.


.svg)