

Written by Mo Kahn on
August 16, 2026


You've got a promising monster sketch, but it still feels like a pile of disconnected ideas. The head looks interesting, the limbs suggest an animal you can't quite name, and the surface details are waiting for a polished render. The problem isn't a lack of imagination. You need a design process that decides what the creature is before an image generator fills in the gaps.
Creature concept art works best as visual problem-solving. You're deciding how a nonhuman character lives, moves, communicates, and supports a story. AI can accelerate exploration, but it shouldn't replace the brief, references, silhouettes, anatomy checks, or production notes that make a design usable.
Creature design has much older roots than digital entertainment. Dragons, unicorns, demons, centaurs, and other hybrid beings appear throughout ancient mythologies and art traditions worldwide, so inventing believable nonhuman life is a millennia-old visual practice, not a recent trend (historical overview of creature design). Modern production changed the purpose of those drawings. Disney used early concept sketches to develop animated worlds and characters in the 1930s, including the forests, cottages, and animal forms associated with Snow White and the Seven Dwarfs (1937), widely described as the first full-length animated feature film.
That shift turned creature art into preproduction testing. A sketch could answer whether the anatomy supported the story, whether the silhouette read clearly, and whether the creature felt dangerous, gentle, comic, or mysterious before a final asset was made.
Start with a short paragraph, not a prompt full of adjectives. For example:
A nocturnal forest guardian protects a village from predators. It lives among wet roots and moss, moves quietly on four weight-bearing limbs, and avoids direct conflict unless humans enter its nesting ground. It should feel watchful and protective rather than purely frightening.
That description gives you more useful direction than “epic fantasy monster.” It establishes behavior, environment, movement, emotional tone, and narrative function. Add approximate scale in relation to a person, then decide whether humans see the creature as a threat, guardian, omen, or ally.
| Design question | What to record |
|---|---|
| What role does it play? | Guardian, hunter, companion, antagonist, or background wildlife |
| Where does it live? | Forest floor, coastal shallows, desert, ruins, underground, or another habitat |
| How does it move? | Crawling, climbing, gliding, swimming, stalking, bounding, or hovering |
| What does it feel like? | Protective, eerie, curious, regal, vulnerable, or aggressive |
| What must viewers notice first? | Eyes, posture, jaw, back profile, limbs, markings, or a distinctive appendage |
| What details are optional? | Horns, scars, jewelry, extra texture, decorative armor, or glowing effects |
Separate essential traits from decoration. The guardian might require a low, quiet stance, broad feet for damp ground, and large eyes adapted to darkness. Antlers, hanging moss, and luminous spores can wait. This separation prevents later sketches and AI generations from treating every idea as equally important.
If your design may become body art, a focused visual brief also helps you design a creature tattoo with TattoosAI, because tattoo-friendly designs need a readable outline and details that survive at a smaller scale. For a broader character exercise, you can also study the structure of creating your own Pokémon, especially the relationship between a creature's role, shape, and memorable identifying feature.
A moodboard shouldn't be an image dump. Every reference needs a job.
For a desert scavenger, collect a bird reference for the forward tilt of the head, a reptile reference for dry skin and heat management, and a hyena or vulture reference for feeding behavior. Then add industrial machinery if the creature has an unnatural adaptation, such as a vent-like throat or exposed cooling plates. You're borrowing functional clues, not copying a finished animal.
Create separate groups for structure, surface, environment, movement, and lighting. Add a short note beside each image, such as “use the ankle angle,” “study overlapping plates,” or “avoid this color pattern because it makes the creature look tropical.” Those annotations turn passive browsing into active design decisions.
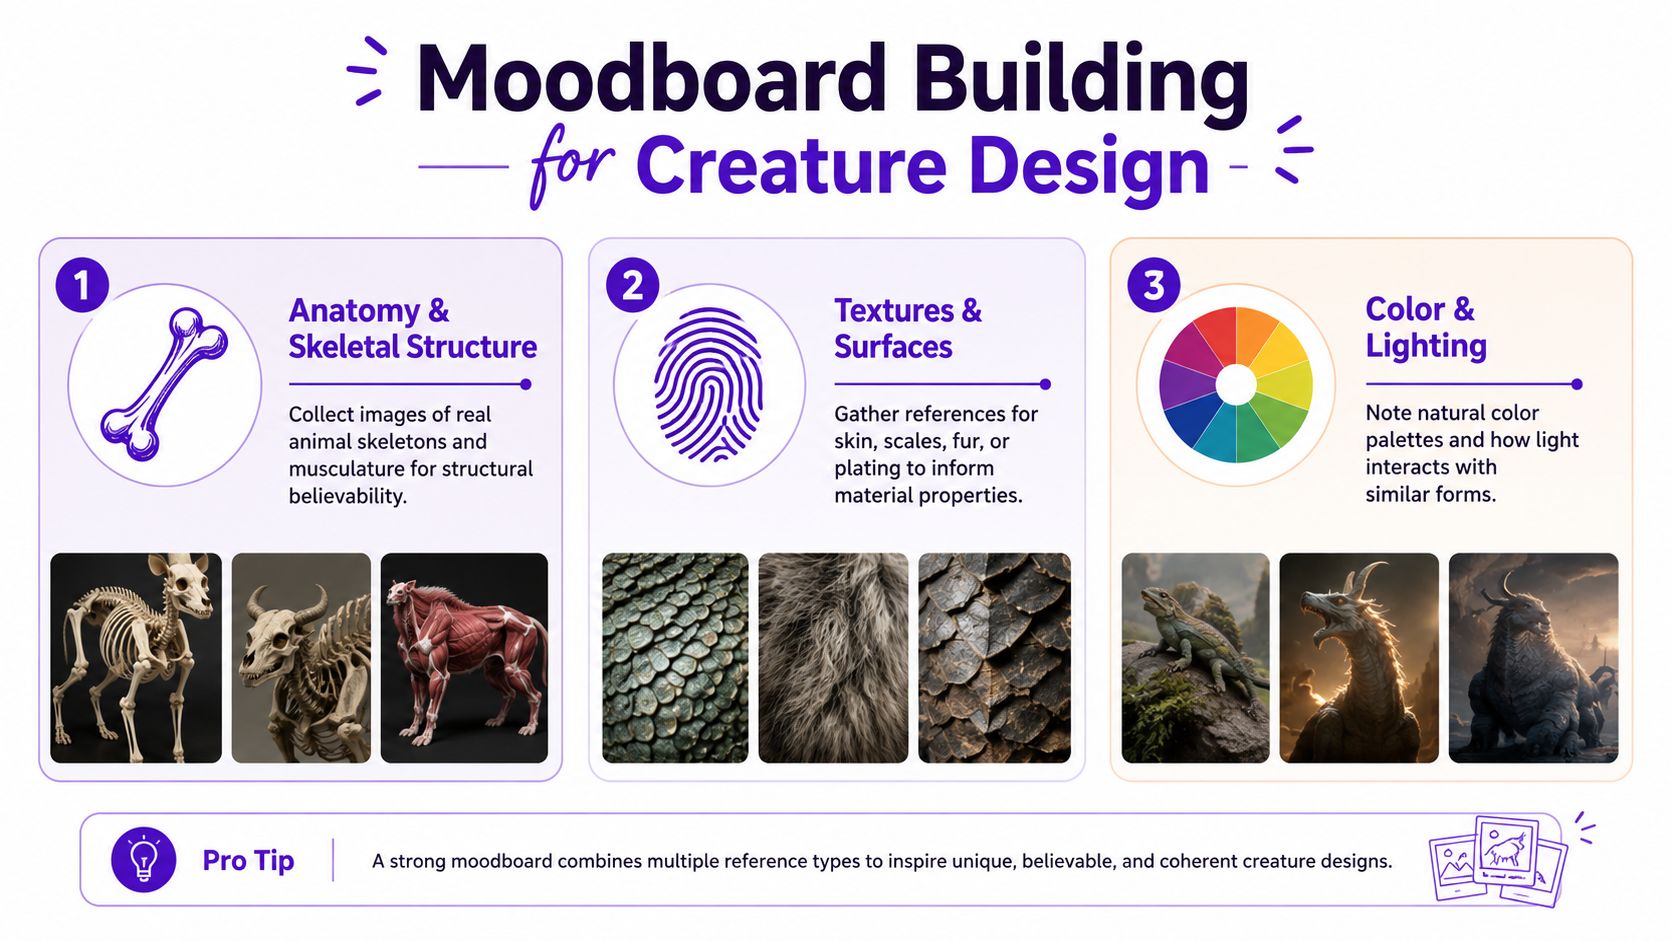
A useful reference sheet usually includes:
Write down what each reference contributes and what you'll change. “Use the crane's long neck, but make it muscular and horizontally balanced” gives you a design rule. “Use beetle plating, but avoid a symmetrical shell” creates room for a more original silhouette.
Research-driven creature design commonly moves from inspiration and concept development through thumbnails, detailed sketching, selection, and refinement, as described in an eight-step creature-design workflow. The sequence matters because references should inform decisions before you commit to a polished image.
Your final moodboard should answer a specific question: what does believable mean for this creature? For the desert scavenger, it might mean a low center of mass, heat-resistant surfaces, a narrow sightline, and a posture that conserves energy. Those signals give both you and an AI image generator boundaries to work within.
A creature can have beautiful scales and still fail if its outline says nothing. Solve the silhouette while the design is cheap to change. Broad shapes reveal whether the head, torso, limbs, and appendages create a recognizable character before detail distracts you.
Start with a swamp ambush predator. Its brief calls for patience, concealment, and a sudden burst of movement. Try several outline directions: a long crocodilian body, a compact frog-like body with spring-loaded hind limbs, and a low quadruped with a raised shoulder ridge. Keep each shape simple enough to read as a solid black mark.
A common production recommendation is to create 10 to 15 pure-black silhouettes before moving forward, using the outline to focus on shape rather than decoration (creature design workshop). Another practical method suggests making 20 silhouettes in about 10 to 15 minutes, selecting 6 that read best, narrowing those to 3 with gesture and role notes, then choosing 1 for a value thumbnail (shape-language silhouette workflow). These are working targets, not laws. The principle is controlled variety before refinement.
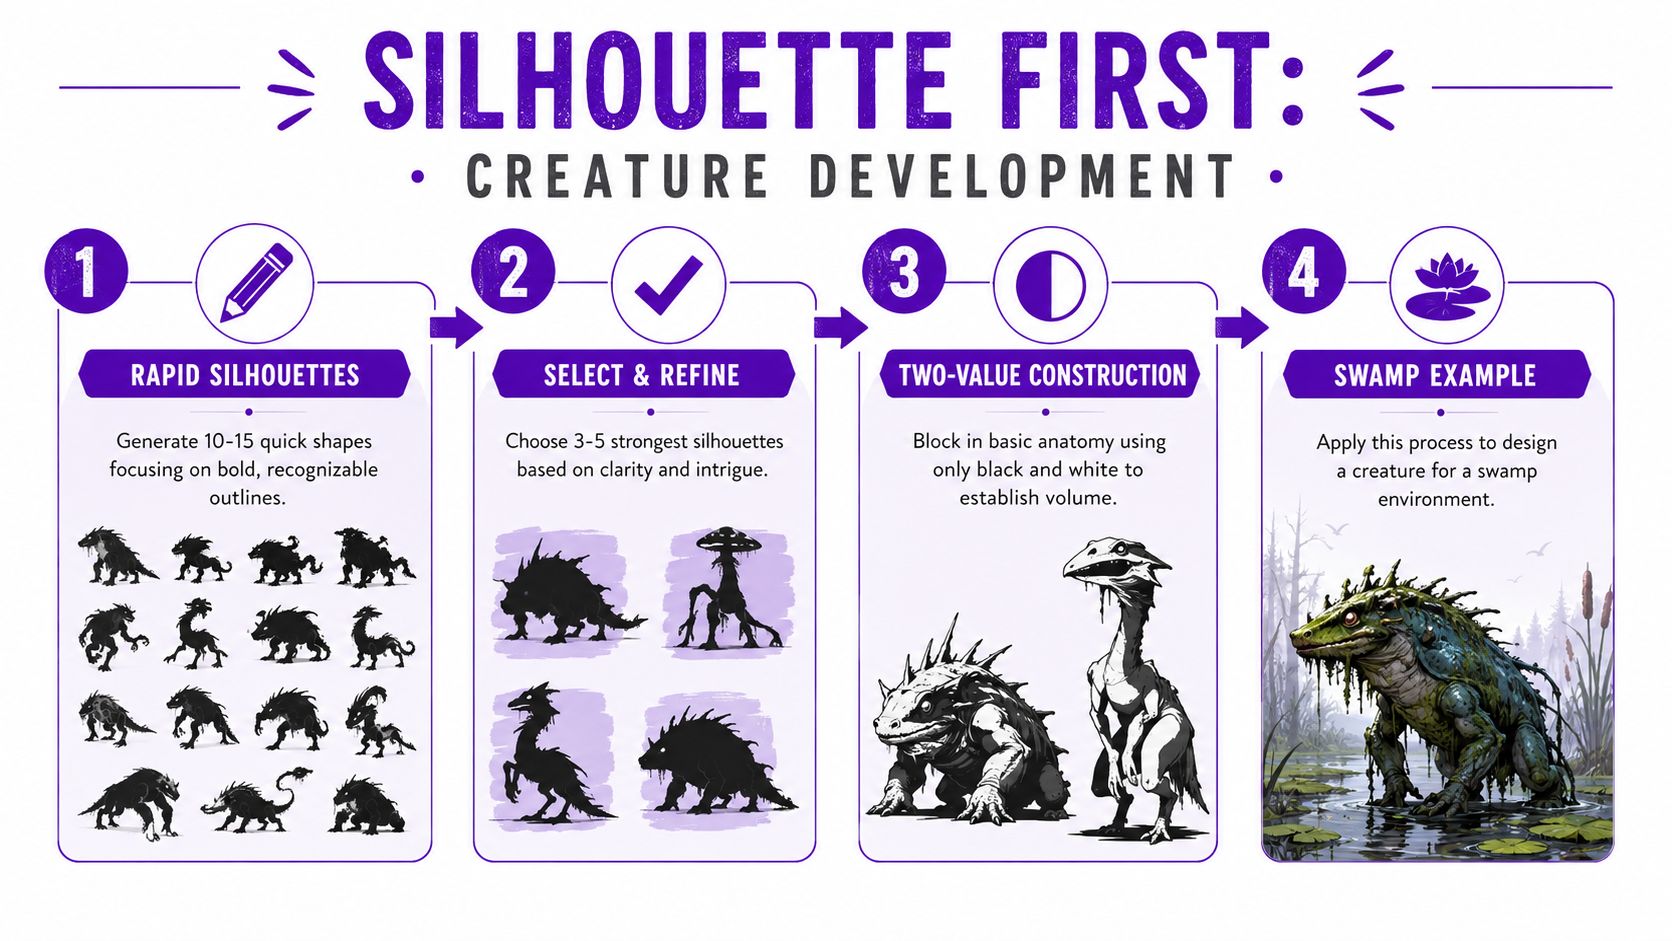
Shrink each thumbnail until it's difficult to inspect. If the swamp predator still reads as a low, patient ambusher, the main idea is working. If it becomes an unidentifiable blob, strengthen the head profile, tail direction, or limb rhythm.
Ask four questions:
That final feature might be a shovel-shaped jaw, a tall dorsal fin, or an unusually broad forelimb. Protect it during every later revision.
Practical rule: If the silhouette isn't readable in a small thumbnail, more texture won't solve the design.
Once you choose a direction, draw a simple skeleton through the silhouette. Mark the spine, pelvis, shoulder mass, major joints, and center of mass. You don't need advanced anatomy. You need to know whether the creature could support itself and repeat its intended movement.
For the swamp predator, the rear legs might compress like a frog's, while the front limbs spread wide to stabilize the body in mud. The torso should carry the largest mass near the pelvis and ribcage, not float above delicate legs. Add muscle groups as connected volumes, then place functional surfaces such as webbing, claws, protective plates, or sensory organs.
Starting with detail creates predictable problems. Guidance on character-design workflows identifies early over-detailing as a major failure mode and recommends broad-to-narrow iteration, with the discovery phase ranging from 2 thumbnails to 200 before a strong direction emerges (character design workflow guidance). Treat rejected silhouettes as useful evidence. They show which shapes fail to communicate the creature's role.
| Drawing stage | Main question | Useful output |
|---|---|---|
| Silhouette | Does the creature read at a glance? | Several black shape options |
| Thumbnail | What gesture and action define it? | Small poses with quick notes |
| Skeleton pass | Can the body carry its weight? | Spine, joints, pelvis, and center-of-mass guide |
| Two-value study | Do the major volumes separate? | Light and dark shape groups |
| Refined direction | Which feature must remain constant? | One selected design ready for prompt testing |
Use this video as a visual companion while you test the sequence:
The selected sketch should control the generation. Don't ask an AI system to invent the creature from a vague description after you've already solved the design on paper. Give it the decisions you want preserved, then use generation to explore camera, atmosphere, material, and presentation.
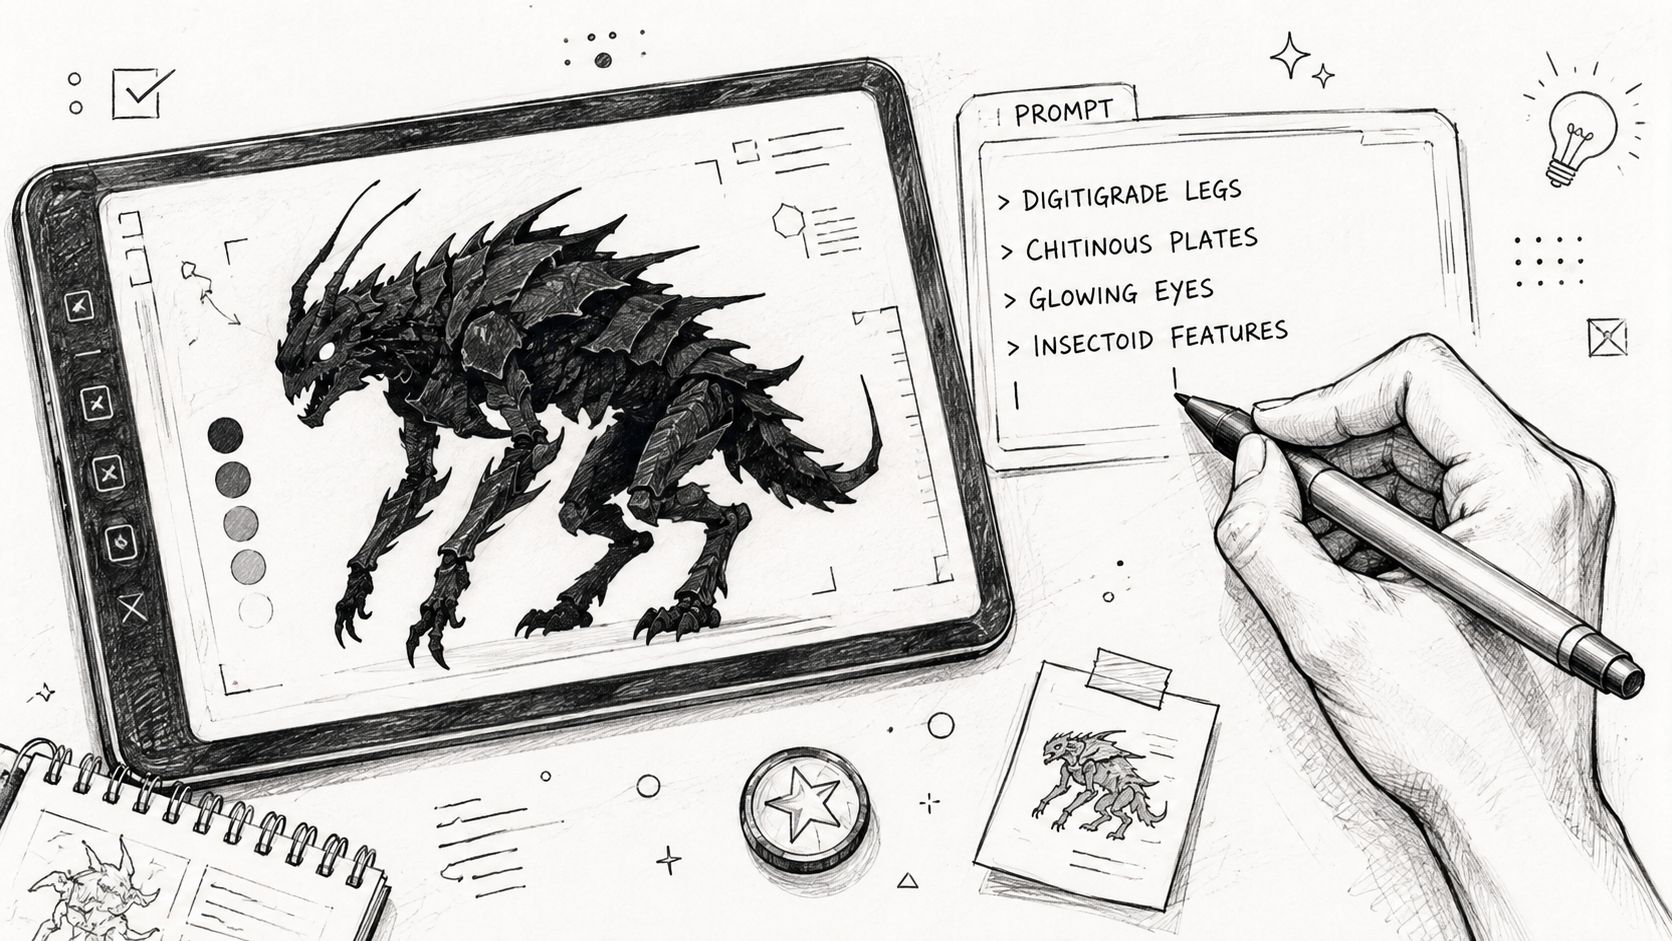
For a horned tide creature, write the prompt in a stable order:
This format makes revisions easier. If the body works but the image feels too dramatic, change only the lighting. If the creature looks too thin, adjust the body mass and stance rather than rewriting every phrase.
You can use starryai for text-to-image exploration and image-to-image refinement, while keeping your sketch as the visual anchor. Its character concept art generator is relevant when you want to test a designed character through multiple visual directions rather than accept a single random interpretation.
Generate a small batch, then compare every result against the original drawing. Don't ask which image looks prettiest first. Ask which one retains the wide stance, fin-like shoulders, horn shape, and coastal identity you established.
A controlled loop looks like this:
Long adjective chains often compete with one another. “Cute, terrifying, elegant, bulky, delicate, realistic, painterly, cinematic” doesn't tell the generator which quality matters most. Replace the list with observable instructions, such as “low defensive posture, broad shoulder mass, narrow eyes, asymmetrical horn growth, three-quarter full-body view.”
Watch for recurring errors. Extra limbs may come from vague anatomy or a crowded pose. Muddled joints may result from asking for extreme motion before the structure is clear. An unwanted second subject can come from environmental language that names too many animals or figures.
Treat each generation as a question about the design. Don't let an attractive accident rewrite the creature without your approval.
Keep rejected images. They can reveal which wording causes a specific failure, and they provide a record of how the design changed. If you plan to turn the work into products or commissions, research places to sell AI art only after you've defined what the image is for and what supporting assets you can provide. A polished image without a stable character direction is difficult to adapt.
Color should explain the creature's life, not merely decorate the render. Begin with a color key made from a limited palette. Assign one dominant body color, one supporting color, a small accent, and a value range for the environment. Test the creature in daylight, shadow, and a tiny thumbnail before adding fine texture.
For the tide creature, dark slate skin could help it disappear against wet rocks. A concentrated blue-green glow might signal communication, warning, or attraction. The markings need a reason to exist, even if the viewer never receives the full explanation.
Different surfaces need different edge and value decisions:
Block the largest color areas first. Separate the creature from the background with value before chasing local texture. Then add material accents only where they support the focal point, such as the face, hands, sensory organs, or defining markings.
AI generation can quickly propose alternative palettes and atmospheres. Manual painting remains valuable for correcting anatomy, restoring a clean silhouette, simplifying noisy edges, and placing contrast deliberately. A useful workflow is to generate broad color options, choose the one that supports the brief, then repaint the areas where the system misunderstood the body.
You can use a color palette generator to explore relationships before committing to a final color key. Keep asking whether the palette communicates habitat and behavior. One strong relationship, such as cool body tones against a warm warning marking, usually creates a clearer identity than several unrelated effects.
A final render becomes a practical concept deliverable when another person can understand it without guessing. Review the forest crawler from the perspective of a modeler, animator, author, or merch designer. The image should show not only what the creature looks like, but also how it occupies space.
Include the polished hero image, a three-quarter or side view, a scale reference, and movement notes. Add callouts for uncertain areas, such as how the jaw opens, where the shell flexes, or whether the hanging tendrils are sensory organs or decoration.
Production-focused creature design guidance emphasizes skeletal logic, scale references, locomotion studies, anatomy breakdowns, and technical constraints rather than attractive illustration alone (production-ready creature design guidance). Check the forest crawler's center of mass, limb articulation, deformation limits, and contact points with the ground. If an animator can't tell how the creature walks, the design isn't finished for animation.
Use selective corrections for common AI weaknesses. Mask and redraw a malformed foot. Crop away an accidental extra subject. Adjust contrast where the outline disappears. Remove decorative plates that make the joints impossible. Preserve the defining silhouette feature even when you simplify surrounding detail.
A book-cover concept, tabletop avatar, sticker, and social post need different presentations. Keep a full composition for print or editorial work, then make separate crops for square feeds, portrait posts, or profile icons. Don't damage the master image just to force it into a social ratio.
Organize the files so the design remains usable:
For an indie author, this package could become a cover concept, character reference, and promotional crop. A tabletop creator might need a full-body portrait, avatar, token, and printable handout. An Etsy seller may need a simplified silhouette that remains legible on a sticker or garment. The design earns its value by surviving those transitions.
A muddy silhouette needs fewer details and stronger value separation. Impossible joints need a skeleton pass, not more lighting. Generic fantasy styling needs specific behavior, habitat, and shape language. Overloaded prompts need fewer competing terms. Inconsistent color needs a single color key. A beautiful image that doesn't fit its use needs a new crop or presentation sheet. Save the brief, references, sketches, prompts, rejected generations, and final files. AI is an iteration partner, not a one-click solution.
starryai lets you explore creature concepts through text prompts and image-based inputs, then develop variations for characters, worlds, social content, or creator projects. Start with your brief and sketch, test controlled directions, and visit starryai to turn the strongest design decision into a usable visual package.


.svg)