

Written by Mo Kahn on
August 21, 2026


You've got a folder full of images, and none of them quite agree with one another. Some are portraits, others are horizontal or wide-angle shots. A few are bright, a few are muddy, and the backgrounds range from clean studio walls to cluttered rooms. Yet the client still expects a consistent gallery, social campaign, or product catalog by the deadline.
That's where batch processing images becomes practical rather than optional. The trick isn't applying one rigid preset to everything. It's building a workflow that sorts variation first, applies the right treatment to each group, and verifies the results before a small mistake spreads through the entire collection.
Staring at 200 mixed images before a delivery deadline creates a particular kind of dread. You know the edits are repetitive, but you also know they aren't identical. One portrait needs a tighter crop, one photo needs a different framing decision, and a bright outdoor shot shouldn't receive the same highlight treatment as an indoor image.
Manual editing turns that variation into a long chain of decisions. At three minutes per image, 200 files would require 10 hours of repetitive work. That calculation is simple, but it leaves out the cost of switching between files, checking exports, renaming derivatives, and correcting mistakes. A properly designed batch workflow can handle the same type of production in under 20 minutes, with the caveat that the preparation and review stages still matter.
The time savings come from removing repeated mechanical actions, not from pretending every image is the same. Resizing, format conversion, color-space conversion, sharpening, naming, and export are strong candidates for automation. Subject placement, unusual lighting, and distracting backgrounds still need rules, grouping, or human review.
A creator delivering one finished image can work intuitively. A photographer delivering a wedding gallery, a marketer preparing assets for Instagram and TikTok, or an Etsy seller producing product variants needs repeatability. Batch processing turns a folder into a production system, where each file passes through defined stages rather than receiving improvised treatment.
Adobe's historical Photoshop workflow used Actions together with File > Automate > Batch to apply the same transformation across many files. Adobe later introduced the Image Processor in R2015a, which works directly without requiring an Action. That shift reflects a broader move from manual macro-style automation toward efficient bulk processing, as described in this history of batch image workflows.
Today, one delivery may need several output families:
The messy folder is normal. The scalable response is to separate what can be standardized from what needs judgment. That's the approach used throughout this guide.
No single batch-processing tool handles every creator's needs well. The right choice depends on whether you need visual control, raw throughput, integration with other systems, or content-aware decisions.
| Tool Category | Best For | Learning Curve | Speed at Scale | Cost Model | Key Limitation |
|---|---|---|---|---|---|
| Desktop applications | Photographers, designers, and retouchers who need previews and layered edits | Low to moderate | Good for organized batches | Usually subscription or license based | Can become slow and fragile with mixed inputs |
| Command-line tools | Developers and technical creators managing repeatable conversions | Moderate to high | Excellent for large, predictable jobs | Often free or open source | No visual feedback during setup |
| Cloud and API services | Teams integrating image operations into websites or production systems | Moderate | Strong for distributed workloads | Usage based or subscription based | Adds latency, service dependency, and data-handling questions |
| AI-powered tools | Creators needing background removal, smart crops, or content-aware variations | Low to moderate | Fast for supported tasks | Often subscription or credit based | Edge cases require careful validation |
Photoshop Actions are a practical fit when the workflow includes layers, masks, adjustment layers, or retouching steps that benefit from visual inspection. Lightroom is useful for synchronizing broad corrections across a set, especially when the files share a location or lighting setup.
A photographer delivering 500 wedding edits may prefer Lightroom for exposure and color consistency, then use Photoshop for selected hero images. The limitation appears when the folder contains multiple lighting environments. A synchronized adjustment can make one scene look polished while pushing another into clipped highlights or unnatural skin tones.
ImageMagick is powerful when the job is clearly defined. It can resize, convert, rename, strip or preserve metadata, and create derivatives without opening each file. Developers can place those operations inside scripts, schedule them, and rerun them consistently.
The trade-off is setup confidence. You won't see a visual preview while constructing the command, so a mistake in crop geometry or color handling can affect an entire output directory. A sample-first workflow is essential.
Cloud and API services make sense when image processing belongs inside an existing application or publishing pipeline. They can receive uploads, create derivatives, and return finished assets without requiring every team member to maintain the same desktop setup. They also raise questions about privacy, upload latency, pricing structure, and service availability.
AI tools are strongest when the transformation depends on image content. Background removal and subject-aware cropping can outperform fixed coordinates on varied inputs, but they aren't infallible. Hair, transparent objects, shadows, reflective products, and crowded backgrounds deserve a review pass.
Practical rule: Choose the tool that makes your failure modes visible. Speed is useful only when you can identify and correct bad outputs before delivery.
The most important batch decision happens before the first Action runs. Start with triage, not automation.
Create a read-only source directory and work from copies. Keep intermediate files in a separate working directory, then write final derivatives to versioned output folders. This structure protects originals and makes it possible to rerun a failed stage without rebuilding the entire project.
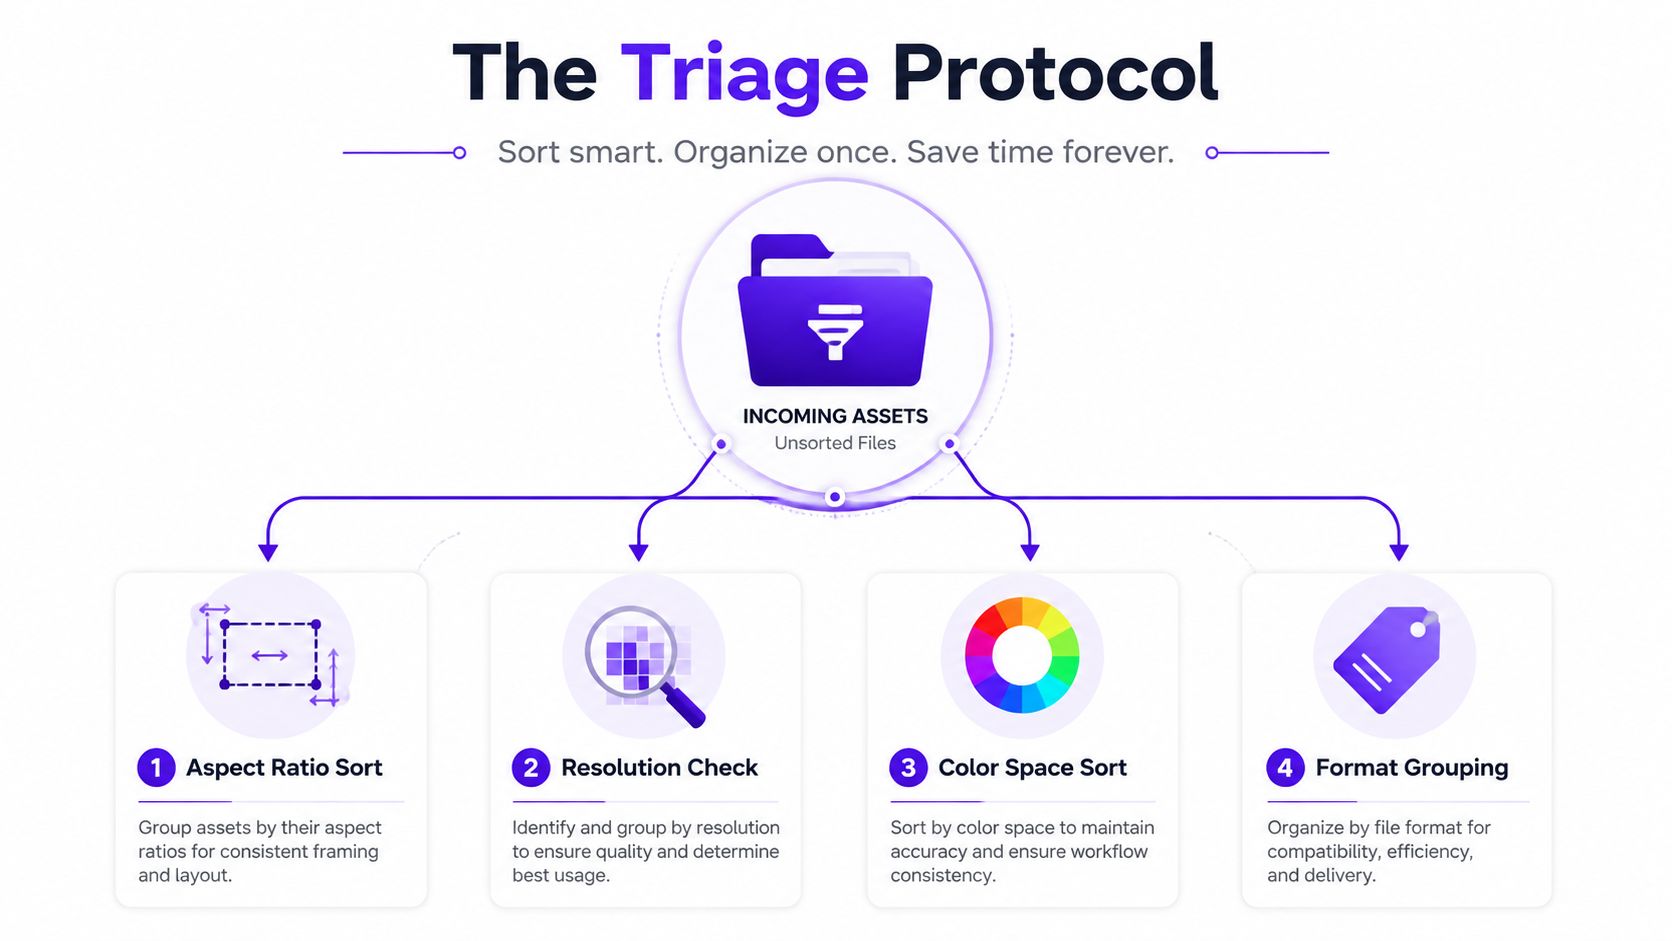
Begin with four practical checks:
Next, group images by processing need rather than by the folder they arrived in. Portraits may need restrained skin-tone adjustments and subject-aware crops. Scenic views often tolerate a different contrast treatment. Screenshots, logos, and illustrations shouldn't be pushed through the same photo preset.
For event photography, scene segmentation matters. Indoor reception images, outdoor portraits, dance-floor images, and group shots often have different lighting patterns. Use filenames, capture metadata, folder labels, or a quick contact sheet to create useful groups.
A reliable directory might contain:
Normalize filenames before processing. Use a stable base name with a variant suffix such as portrait_001_social or product_014_web. Avoid vague names like final2 and newfinal, which make later corrections harder.
A short preparation pass can prevent the most expensive failures, such as applying portrait crops to open vistas or compressing highlights in already-bright scenes. For large batches, this workflow guidance on safe processing emphasizes separate input, transform, validation, and output stages, along with rerunnable jobs, skipped completed files, and error logs.
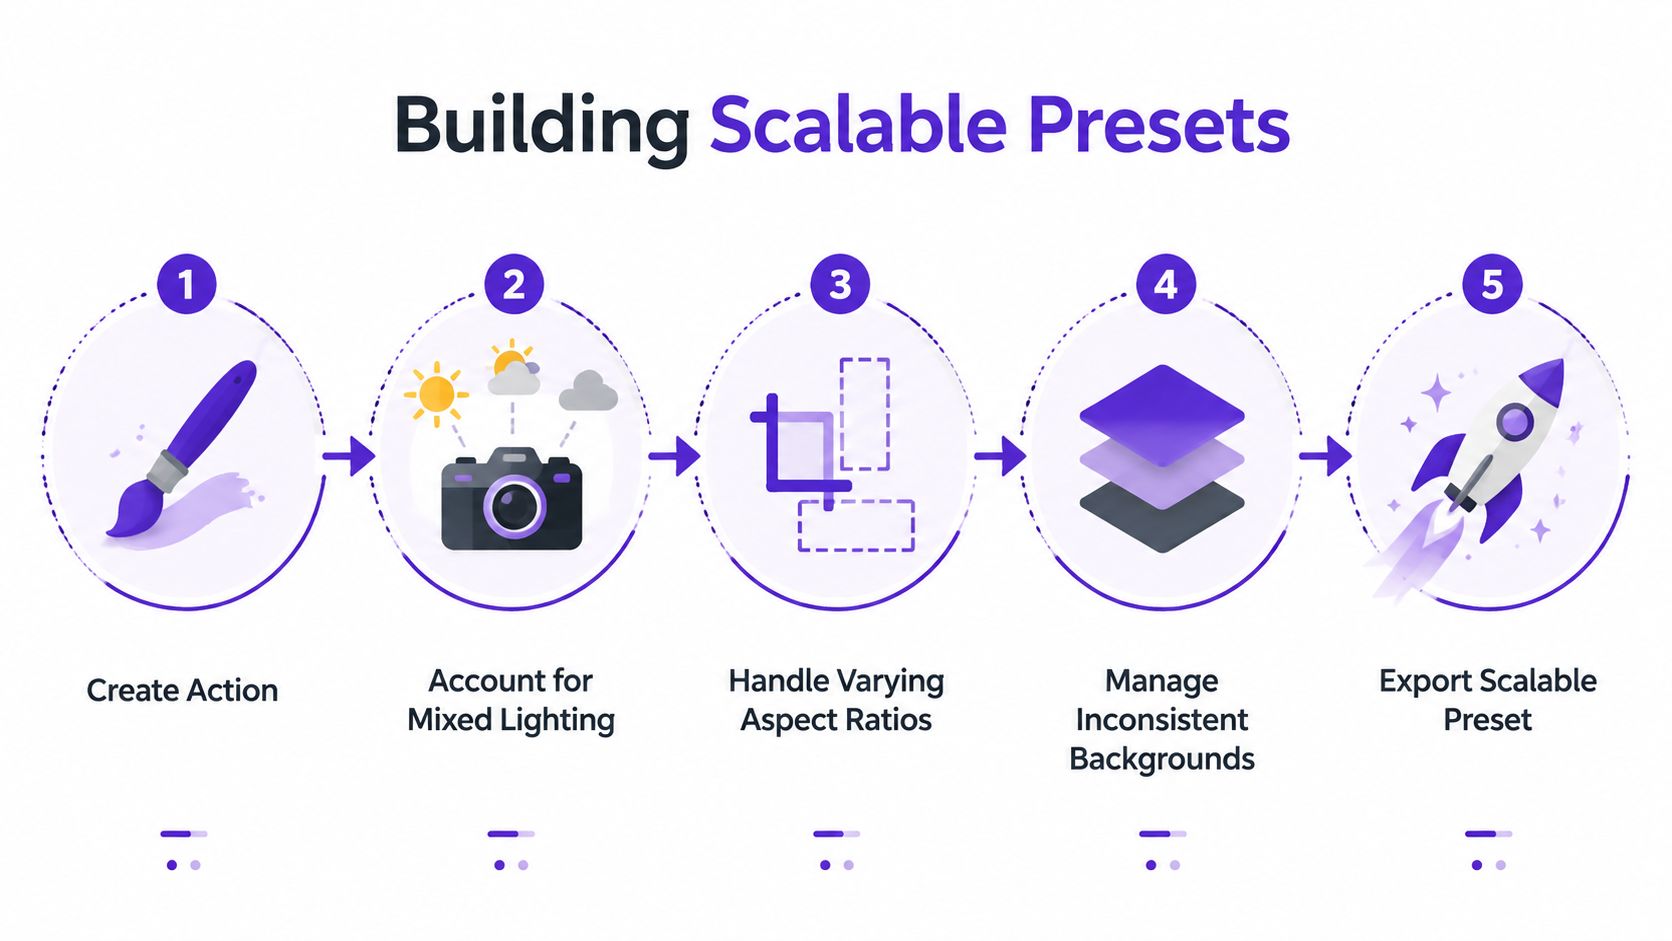
A folder can mix window-lit portraits, harsh outdoor frames, square product shots, and transparent graphics. A preset that works on the first group may ruin the next. Build automation as modular decisions, so unusual files can take a different path without breaking the full batch.
In Photoshop, keep Actions narrow. One Action can prepare the document, another can apply broad tonal corrections, and a third can export a derivative for a specific destination. Smaller Actions are easier to test, replace, and combine than a single recording that assumes every file needs the same treatment.
Mixed lighting needs separate handling. Group underexposed, balanced, and bright scenes, or use a conditional workflow that checks image characteristics before applying exposure changes. Lightroom synchronized settings are useful for shared adjustments, but keep selective overrides available for files outside the group's normal range.
Cropping needs the same flexibility. A fixed crop box works only when subject placement and aspect ratios stay predictable. For portraits and profile images, use subject-aware tools where available, then inspect faces, hands, product edges, and important text. Automation can handle repeated framing work, while edge checks catch the failures that templates miss.
ImageMagick suits predictable transformations such as adaptive resizing, format conversion, and output naming. Python scripts using Pillow or OpenCV give more control when the workflow needs image inspection, metadata rules, or branching logic. As a script makes more decisions, logging and sample review become more important.
A polished sample proves very little. Build a small edge-case set containing:
Run every preset against that set and compare the results at full size. Keep versions of Actions, presets, and scripts, and record what each version expects as input. Six months later, that note can separate a quick rerun from a forensic reconstruction.
Creators who need visual asset variations before batch cleanup can use starryai to generate images from prompts, selfies, and emojis. Its paid tiers also include bulk creation capabilities. It can serve the generation stage, while a separate validation and export workflow handles delivery requirements.
Set automation up to handle known decisions, and leave uncertain cases visible for review. The quick turnaround time workflow applies when a production system needs speed without skipping the checks that protect quality.
Let the destination drive every export decision. Start with each platform's requirements, then build derivatives from the untouched master. Every derivative needs its own format, dimensions, naming pattern, and color policy.
JPEG remains practical for photographs without transparency. PNG suits graphics, text, and transparent assets. WebP and AVIF can reduce web payloads when supported, while TIFF fits archival or print workflows that need high quality and preserved editing information.
Quality settings require testing against the actual content. Smooth gradients can reveal banding or blocking before a flat illustration does. Product mockups with small text need closer inspection than casual social images. Choose the smallest file that preserves the detail viewers need, rather than automatically selecting the highest setting.
| Platform/Use Case | Format | Quality/Resolution | Color Space |
|---|---|---|---|
| Social posts | JPEG for photographs, PNG for graphics | Match the platform's current dimensions and inspect compression | sRGB |
| Web galleries | WebP or AVIF where supported, JPEG fallback | Optimize for fast loading while checking detail at display size | sRGB |
| Merch mockups | PNG for transparency, JPEG for opaque previews | Preserve clean edges and readable artwork | sRGB for web previews, print profile when required |
| Print delivery | TIFF or high-quality JPEG | Follow the printer's supplied dimensions and resolution requirements | Use the printer's requested profile |
| Logos and line art | SVG where supported, PNG fallback | Preserve sharp edges and transparency | sRGB for digital use |
Mixed folders need a little more structure before automation. Separate portrait-oriented files, horizontal and wide shots, transparent artwork, and photographs with busy backgrounds when their crops or formats differ. A single preset rarely handles every aspect ratio cleanly. Keep masters separate from derivatives in folders such as masters, social, web, print, and archive, then add date prefixes or project codes when filenames overlap.
A manifest records the source filename, output filename, dimensions, format, color profile, and processing status. That record makes it easier to identify the file used in a campaign without opening every folder.
For practical web-specific guidance, the image workflow for mattress retailers explains considerations for presenting product imagery online. The same checks apply to catalogs where clarity, loading behavior, and consistent framing influence how products are judged.
Before delivery, validate dimensions, file size, readability, and visual quality. Test 3–5 sample images, review them at 100% zoom, confirm metadata preservation, and check that final files meet platform requirements before processing the full set, as outlined in this batch validation guide. For a straightforward resizing step, use the starryai image resize tool with generated or existing visual assets.
The fastest reliable recipes are short pipelines with clear inputs and outputs. Mixed image sets need a sorting step before automation, because lighting, framing, backgrounds, and aspect ratios can change how a preset behaves.
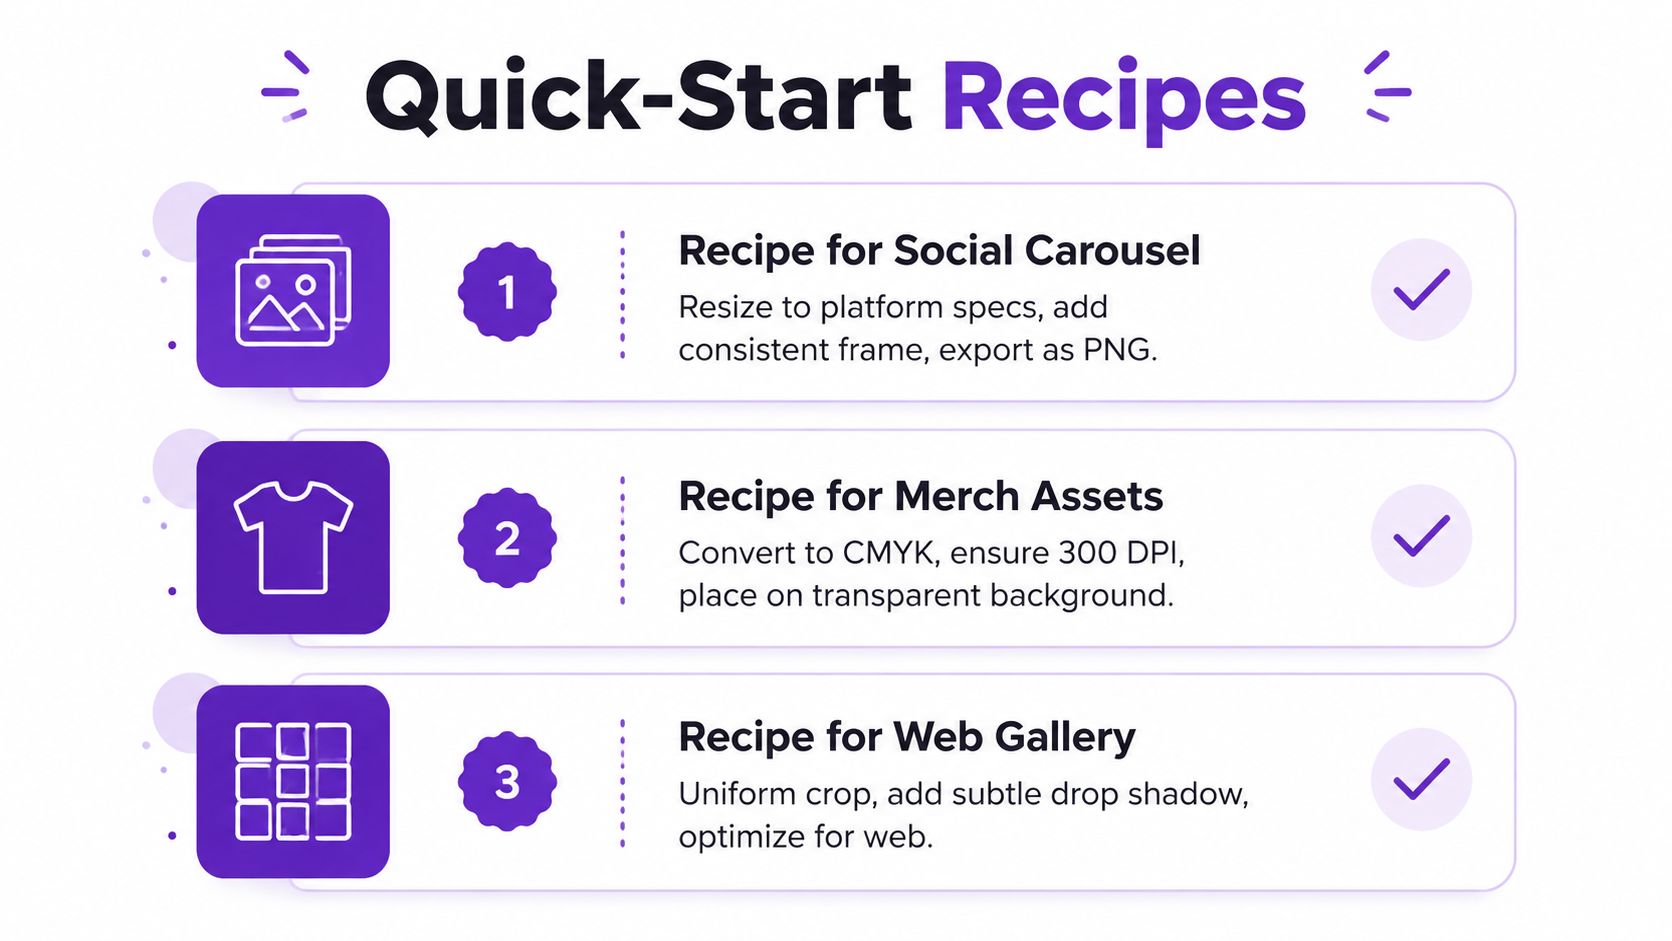
Separate portrait-oriented files from horizontal or wide-format sources before building the Action. In Photoshop, apply the chosen crop, restrained color adjustment, subtle sharpening, and sequential naming in one pass. Export a version for each destination from the clean source, rather than repeatedly resizing an already compressed derivative.
ImageMagick works well for predictable resize and conversion sequences. Test it on a sample folder first. If faces drift toward an edge, replace fixed cropping with subject-aware positioning in a desktop or AI tool, then review the results manually. Images with busy backgrounds may need a separate crop rule from clean product shots.
Keep the artwork master untouched. Generate a transparent PNG for mockups, an opaque web preview, and a print-oriented derivative using the production partner's requested profile and resolution. Transparency failures often begin when artwork is exported against a solid background or layers are flattened too early.
Inspect thin lines, small lettering, and artwork edges at full size. For a closer explanation of resolution choices, use this guide to image resolution for printing.
Create a square crop with subject-aware positioning, then generate size variants from the same clean master. Keep a face, logo, or character away from the crop boundary. Apply brand color treatment before resizing, since small outputs can make compression artifacts more visible.
If faces vary between outputs, inspect the crop stage before adding sharpening. Color shifts usually point to the embedded profile or export policy. If files overwrite one another, correct the naming rule before rerunning.
Process large jobs in smaller chunks when an application or browser approaches its memory limit. For batches of 500+ images, one guide recommends groups of 50–100 images to reduce bulk-operation failures, as described in these batch image conversion practices. GPU pipelines can also benefit from batching, although larger batches increase end-to-end latency. A 4K benchmark found RunMat faster than PyTorch and NumPy across tested batch sizes, with the largest relative advantages at smaller batches, according to the RunMat image-processing benchmark.
Preprocessing may improve OCR, but enhancement should be gated by a sample review. In a logistics-document evaluation, CLAHE plus adaptive thresholding improved character error rate on 13 of 20 images, while worsening or leaving it unchanged on 7 of 20. Average CER fell from 33.99% to 26.91%, a 7.07 percentage-point reduction, or 20.8% relative improvement, supporting a selective filter rather than a universal one, according to the KTH document preprocessing evaluation.
starryai can help create batches of AI-generated visuals and variations before you sort, resize, crop, and export them for specific destinations. Visit starryai to generate image sets for social content, merch concepts, avatars, and other creator workflows, then validate and organize the files before delivery.


.svg)