

Written by Mo Kahn on
September 12, 2026


You've opened an AI image generator, typed something like “a girl in a magical forest,” and now you're staring at four images that are beautiful, strange, or completely unrelated to what you imagined. That moment is normal. The tool isn't broken, and you haven't failed at creativity. You're learning how to give visual instructions to a system that interprets language in its own unpredictable way.
This guide treats AI image generation for beginners as a hands-on creative habit, not a technical exam. You'll start with a simple idea in starryai, build the prompt layer by layer, make one controlled change at a time, and learn how to respond when faces, hands, outfits, or backgrounds go off course. The aim isn't one perfect generation. It's a repeatable process you can use for a selfie transformation, a character concept, a social post, or a printable design.
A first session often looks like this. You want a dreamy profile picture, so you type “portrait of me under purple moonlight.” The result may have the right mood but the wrong clothing, an unfamiliar face, or a background that feels more fantasy castle than quiet night. You might be tempted to add a huge paragraph of instructions immediately. Resist that urge.
Text-to-image tools translate words into visual choices. They make guesses about lighting, composition, color, materials, camera viewpoint, and artistic treatment. You don't need to understand the underlying model to begin. You need to notice what the image got right, identify the biggest miss, and adjust the next prompt accordingly.
starryai fits this low-pressure approach because you can work from a text prompt, a selfie, or an emoji and turn the result into something designed for sharing. The platform's appeal for first-timers is the short distance between an idea and a visual experiment. If you're curious about the broader idea behind this kind of creation, this introduction to generative art gives useful context without requiring a design background.
AI image creation has moved far beyond a niche hobby. Since consumer AI image generators launched in mid-2022, more than 30 billion AI images have been created globally. A 2023 benchmark estimated the pace at about 34 million images per day, and that output later rose to roughly 80 million per day in 2026, according to reported AI image generation statistics. That scale reflects how easily beginners and casual creators can now experiment.
Don't measure success by whether the first image belongs on a poster. A useful first session might produce:
Practical rule: Treat each generation as a question. The image answers, and your next prompt asks a more precise question.
By the end of this guide, you'll be able to create a polished-looking avatar, a character reference, or a simple merch concept without chasing a magical phrase. You'll also know when to accept an unexpected result, when to regenerate, and when to edit the prompt instead of blaming yourself.
The right starting input depends on what you already have in mind. A blank text field offers the most freedom, while a selfie gives the generator a visual starting point. An emoji sits between the two, because it supplies a mood or idea without committing you to a detailed description.
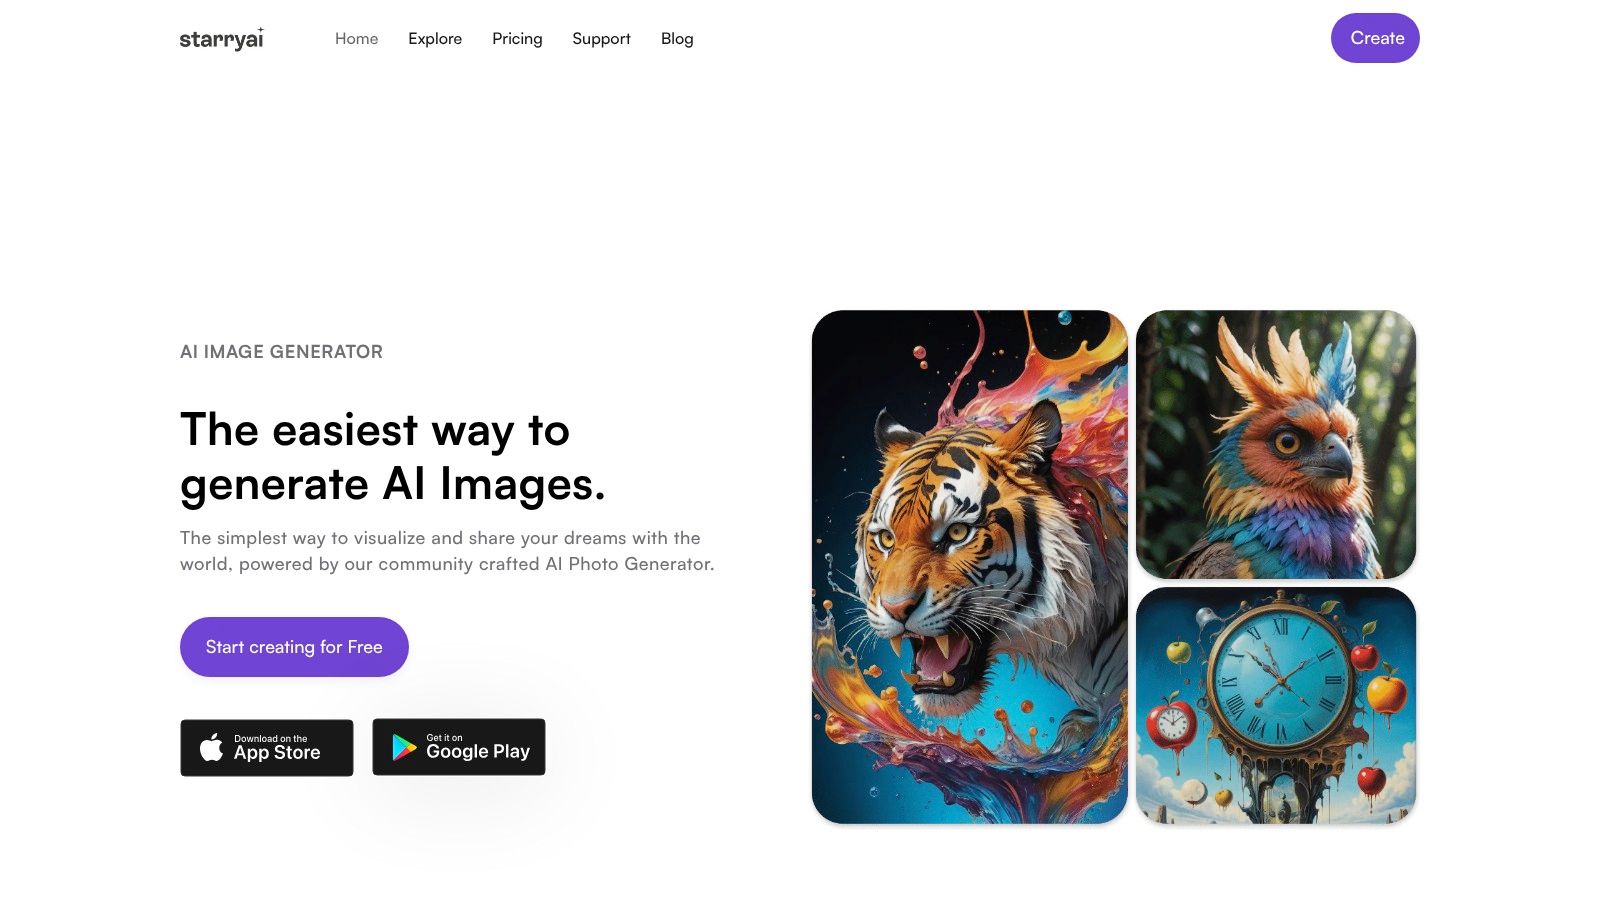
Start with text when you're creating something that doesn't exist yet. This route works well for a fantasy scene, an indie book character, a tabletop RPG avatar, or a product-print idea. You control the subject from the first word, so it's also the best path for learning prompt structure.
Try:
“A curious fox carrying a tiny lantern through a rainy woodland, illustrated fantasy art.”
The prompt doesn't need to be perfect. It gives the generator a subject, action, setting, and broad style direction.
A photo input makes more sense when the person is the main point. Use it for a seasonal glow-up, a cinematic profile image, a TikTok-inspired transformation, or an avatar that should resemble you. Pick a clear image where your face is visible, then use the text prompt to describe the new setting, clothing, mood, and visual treatment.
Before uploading another person's image, get their permission. For any input, avoid sharing material you aren't comfortable placing into a creative service.
An emoji is useful when you know the feeling before you know the scene. A moon, sparkles, crown, or fire emoji can become a starting point for an aesthetic exploration. Add a short phrase if the result needs direction, such as “dreamy editorial portrait” or “cute sticker design.”
A simple decision rule keeps the interface from feeling crowded:
| Your immediate goal | Useful starting point |
|---|---|
| A new world, object, or character | Text prompt |
| A personal avatar or selfie trend | Photo input |
| A mood board or playful experiment | Emoji |
Choose one route, create a first result, and only then decide whether you need more control. Beginners often get stuck because they try to solve every creative decision before seeing what the generator can do.
The biggest beginner mistake is assuming that a longer prompt automatically gives better direction. Length helps only when each phrase adds useful information. A prompt packed with unrelated adjectives can make the visual target less clear.
A controlled study found that participants could judge prompt quality and write descriptive prompts, but many lacked style-specific vocabulary. Only a small share explicitly included style information, and 58.13% of prompts contained no repeated tokens, a pattern associated with shallow, non-iterative drafting. The findings are discussed in research on prompt quality and visual style.
The fix is simple. Build the prompt in groups, then test each group before adding another.
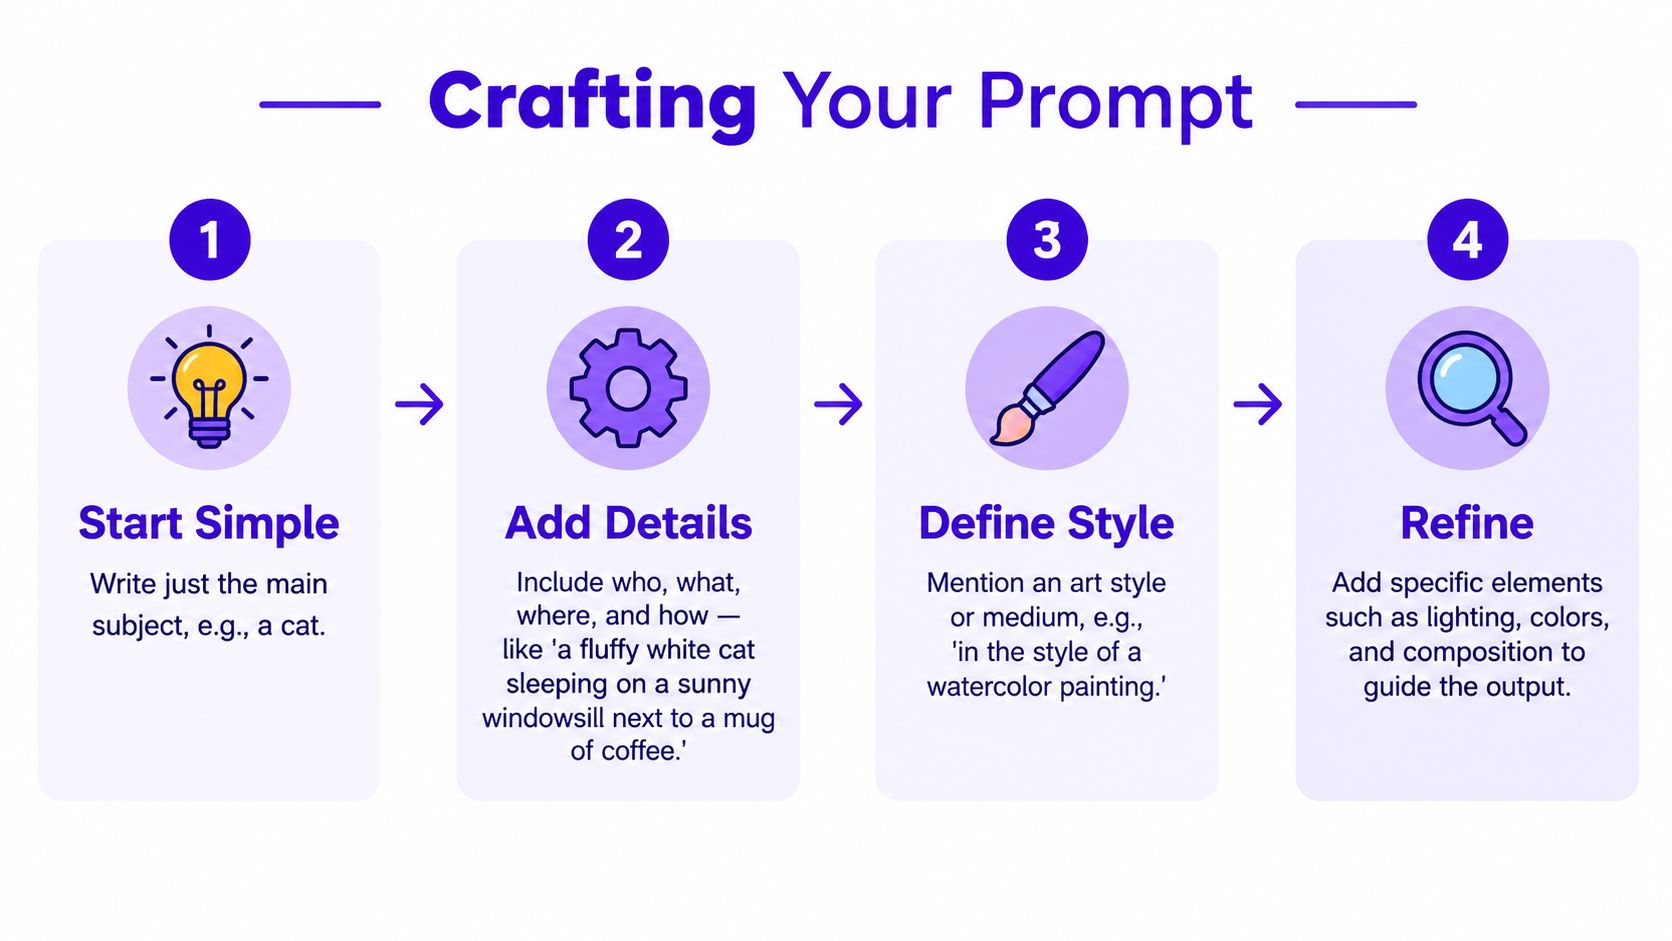
Write the smallest useful version first:
“A young astronomer.”
Generate it, or at least pause and identify the subject clearly. You're establishing the center of the image before asking for atmosphere or polish.
Next, add the action and setting:
“A young astronomer studying a star map on a rooftop observatory.”
Now add the visual treatment:
“A young astronomer studying a star map on a rooftop observatory, cinematic digital painting.”
Finally, add mood and composition:
“A young astronomer studying a star map on a rooftop observatory, cinematic digital painting, deep blue night, warm lantern light, three-quarter portrait, detailed clouds.”
Each layer answers a different question. Subject says what belongs in the image. Scene says where it happens. Style and medium say how it should look. Lighting and composition guide the emotional tone and arrangement.
Beginners often know that an image should feel “cool” or “professional,” but those words leave too many visual decisions open. Replace broad feelings with terms that describe a medium or presentation:
Don't add every term at once. Try one group, compare the output, and keep only what moves the image closer to your goal.
A reliable structure looks like this:
Subject + action or attributes + setting + style or medium + lighting + composition
For a book character:
“A clever apprentice witch with copper braids and a navy cloak, standing inside a cluttered magical library, painterly fantasy concept art, glowing candlelight, full-body composition.”
For a merch idea:
“A sleepy black cat curled around a crescent moon, simple bold line art, lavender and cream palette, centered sticker design, clean white background.”
For a selfie transformation:
“Portrait of me as a futuristic street racer, reflective jacket, neon city at night, cinematic editorial photography, magenta and blue lighting, close-up composition.”
A small prompt change can produce a markedly different image. Research on text-to-image workflows highlights the need for consistent subjects, scene control, and refinement, rather than relying on a single generation. The practical lesson is to change one keyword group at a time. If the face changes, the outfit becomes unclear, and the lighting shifts all at once, you won't know which edit caused the improvement.
For more practice with this method, use this beginner guide to prompt engineering. You can also watch the walkthrough below before trying your own layered prompt.
Write down the version that works. A saved prompt becomes a template you can reuse for a new character, color palette, season, or platform format.
Settings become easier when you treat them as creative choices instead of technical controls. You don't need to understand every option before generating an image. Pick the setting that answers your immediate problem.
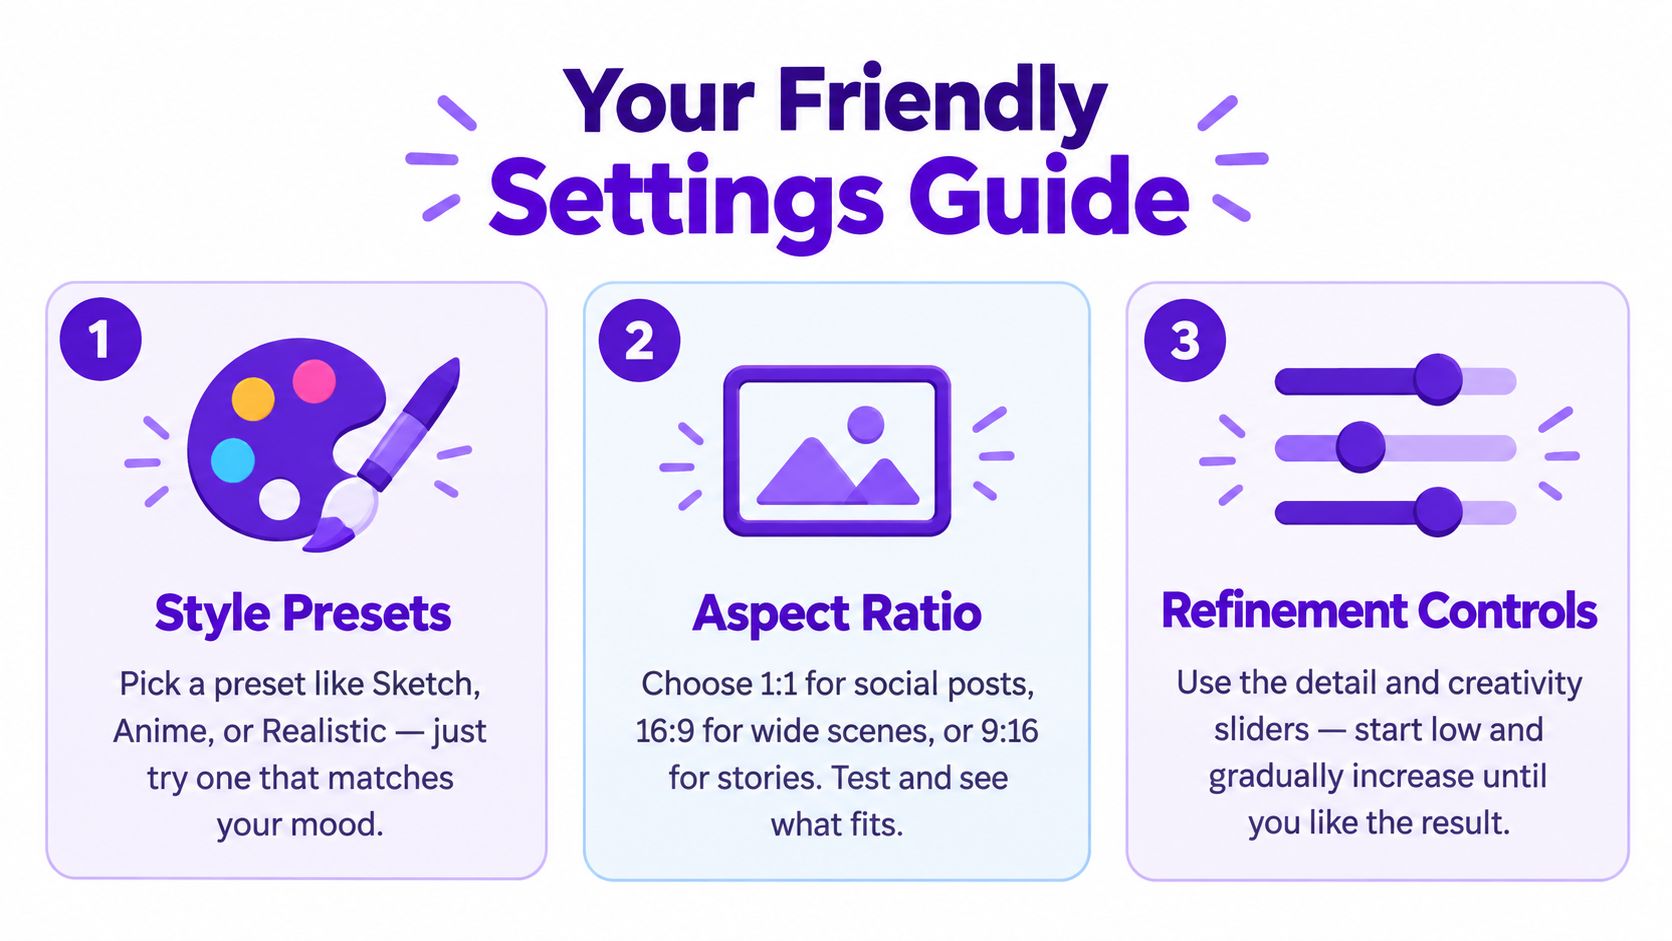
A style preset can establish a strong baseline. Choose Anime for expressive character work, Realistic for a photographic feel, or Sketch when you want visible drawing marks. The preset doesn't replace the prompt. It gives the prompt a visual context.
If your output looks too polished for a children's story, switch to a hand-drawn or watercolor direction. If it looks too flat for a product mockup, try a realistic treatment and add studio lighting in the prompt.
The aspect ratio should reflect where the image will appear:
Changing the ratio can change how the composition behaves. A character that feels balanced in a square frame may become too small in a wide scene. Keep the prompt stable while testing the ratio so you can see what the canvas itself changes.
Refinement controls can affect detail, creativity, or how closely the result follows your starting direction. Begin conservatively, then move one control gradually. If you change several sliders together, you'll lose the ability to tell which adjustment helped.
Negative prompting can also remove recurring distractions. If your image keeps adding text, extra objects, or a busy background, name those unwanted elements in the negative prompt field when the workflow offers it. This doesn't guarantee perfect removal, but it gives the generator a clearer boundary.
One-change method: Keep the subject and style fixed, adjust one setting, generate again, and compare the pair side by side.
A guided workflow can also reduce setup time while you're learning. In one related workflow benchmark, assisted generation reduced task time from 12 minutes and 47 seconds to 3 minutes and 13 seconds, as reported in research on guided image-generation workflows. The useful takeaway isn't that every session will take the same amount of time. It's that organized retrieval, structured iteration, and reusable decisions can remove needless friction.
Why does a prompt that worked once fail on the next generation? Because prompt changes aren't minor edits to a fixed design file. Text-to-image systems may reinterpret the whole image when you alter a phrase, even if the change seems small. Multiple generations and post-editing are normal parts of the process, not evidence that you're doing something wrong.
For a recurring character, repeat the key identity details in every prompt. Keep the description focused, such as “short silver hair, green coat, round glasses,” rather than replacing those details with a vague phrase like “the same character.” Use a reference image when the workflow supports it, and change the scene or pose separately from the character description.
Long image series remain difficult when you need the same face, clothing, and style across many generations. Recent beginner-focused coverage also highlights how advanced interfaces can overwhelm new users and how consistency remains a challenge for recurring visual assets, as discussed in this guide to AI image generation.
Put the essential subject earlier in the prompt and describe its relationship to the scene. “A red umbrella held by the character” is more actionable than adding “red umbrella” at the very end of a long paragraph. If the object still disappears, remove secondary details and regenerate with a tighter prompt.
Inspect the image before sharing it. AI tools can produce convincing overall compositions with local errors, especially around fingers, tiny lettering, jewelry, and crowded intersections. Regenerate with a simpler pose, use a negative prompt for unwanted elements, or choose a crop that removes the weak area. For designs requiring exact wording, add the text later in a graphics editor instead of expecting the generator to typeset it perfectly.
Add a specific medium, viewpoint, or lighting treatment. “Fantasy portrait” is broad. “Painterly fantasy character concept art, low-angle view, warm candlelight, textured brushwork” gives starryai more visual anchors. Change one group, then compare the new result with the previous version.
You'll learn faster by finishing small projects than by endlessly collecting prompt tips. These three ideas use the same sequence: choose a subject, add context, define the style, then refine one group at a time.
Start with a selfie and describe the transformation:
“Portrait of me as a moonlit pop star, silver jacket, soft lavender makeup, dreamy editorial photography, glowing blue and violet lights, close-up.”
Try a realistic preset first. If the result feels too ordinary, change only the style group to “glossy music-video still” or “surreal fashion editorial.” Keep the face and lighting details stable while you compare versions.
Begin with the role, not a long backstory:
“A brave desert cartographer with a brass compass and red scarf, standing beside an ancient canyon, painterly adventure concept art, golden-hour light, full-body composition.”
Choose a character-focused or painterly style. If the clothing becomes inconsistent, repeat the defining garments and accessories in the next prompt. Save the strongest version as a reference for future scenes.
Keep the composition uncluttered:
“A sleepy black cat curled around a crescent moon, bold clean line art, lavender and cream colors, centered sticker design, white background.”
A square ratio can suit a sticker or social preview. Use a negative prompt to discourage extra objects or background clutter, then inspect the edges before exporting. If you add lettering, place it separately so the final design stays readable.
Use this quick-start guide for the starryai app when you want a guided refresher. If you publish AI-generated or manipulated content, label it clearly where appropriate. The European Commission says its AI Act transparency materials cover AI-generated or manipulated content and describe deepfakes as image, audio, or video content that falsely appears authentic. NIST also identifies metadata and digital watermarks as possible provenance signals in synthetic content, as explained in its synthetic-content report.
Copyright deserves a quick check before you sell or publish. The U.S. Copyright Office's current position is that material created solely by AI isn't eligible for copyright registration, while human direction, prompting, or alteration may protect the human-authored parts. Reuters also reported that the Supreme Court declined to hear a dispute involving AI-generated material, while purely AI-generated images continue to face significant copyright barriers in the United States, as covered in its report on the decision.
starryai turns text prompts, selfies, and emojis into visual variations you can refine for social posts, characters, avatars, and creative experiments. Start with one small idea today, change one keyword group at a time, and visit starryai to make your first image.


.svg)