

Written by Mo Kahn on
October 5, 2026


You've uploaded a selfie, chosen a hairstyle, and generated a result that should look effortless. Instead, the new hair sits like a cap above your forehead, the roots cast a dark band across your skin, and a few strands wander onto your cheek. The transformation is technically impressive, but it doesn't look like you.
To add hair to a picture convincingly, treat the hairline as the main editing problem, not as a small detail after the hairstyle has been generated. A clean source photo, a controlled mask, and a prompt that describes texture and light will usually produce a more usable portrait than a one-click filter.
The first bad result often looks harmless at thumbnail size. Open it closely, though, and the faults become obvious. The crown has uniform volume, the front edge is too sharp, and the hair appears to begin at a mathematically perfect line instead of emerging from the scalp. AI tends to solve the broad shape first, while realism depends on dozens of smaller relationships between strands, forehead skin, side hair, ears, and shadows.
That's why a generic request such as “add realistic hair” usually underperforms. The system has to guess the hairstyle, density, direction, color, root transition, and lighting all at once. If the prompt doesn't describe those variables, it may create a polished style that ignores the original portrait.
Practical rule: If the hairline looks wrong, changing the color rarely fixes it. Refine the mask and the root description first.
Digital retouching has always involved this kind of boundary problem. Manual alteration of negatives and prints dates back to the 19th century, with a commonly cited early example from 1846, when Calvert Jones was described as removing a monk from a rooftop negative using India ink. Studios later used airbrushing and negative painting to polish hairlines and create idealized portraits. The shift to Photoshop in the early 1990s made this work more accessible and moved it from darkroom manipulation to pixel-level editing. This history of portrait retouching places modern AI hair editing within that longer progression.
A practical AI editor works better when you guide the edit instead of handing over the entire portrait. Use a targeted mask around the sparse area, preserve the face and ears, and describe how the new hair should meet the skin. The approach is less like applying a wig and more like rebuilding the transition between existing visual elements. For broader context on why generative systems need precise instructions, compare this workflow with realistic AI image generation techniques.
Start with a portrait that gives the editor clean information. Choose even light, visible facial edges, and a background that doesn't contain branches, cables, patterned wallpaper, or objects close to the head. Harsh overhead light can create deep shadows at the forehead and crown, while backlighting can erase the boundary the system needs to understand.
Upload the clearest version of the image you have. A front-facing or slightly angled portrait is easier to control than a strong profile, especially if you want to preserve both the forehead and side hair. Avoid applying a beauty filter first, because excessive smoothing removes the skin texture that helps the generated strands blend naturally.
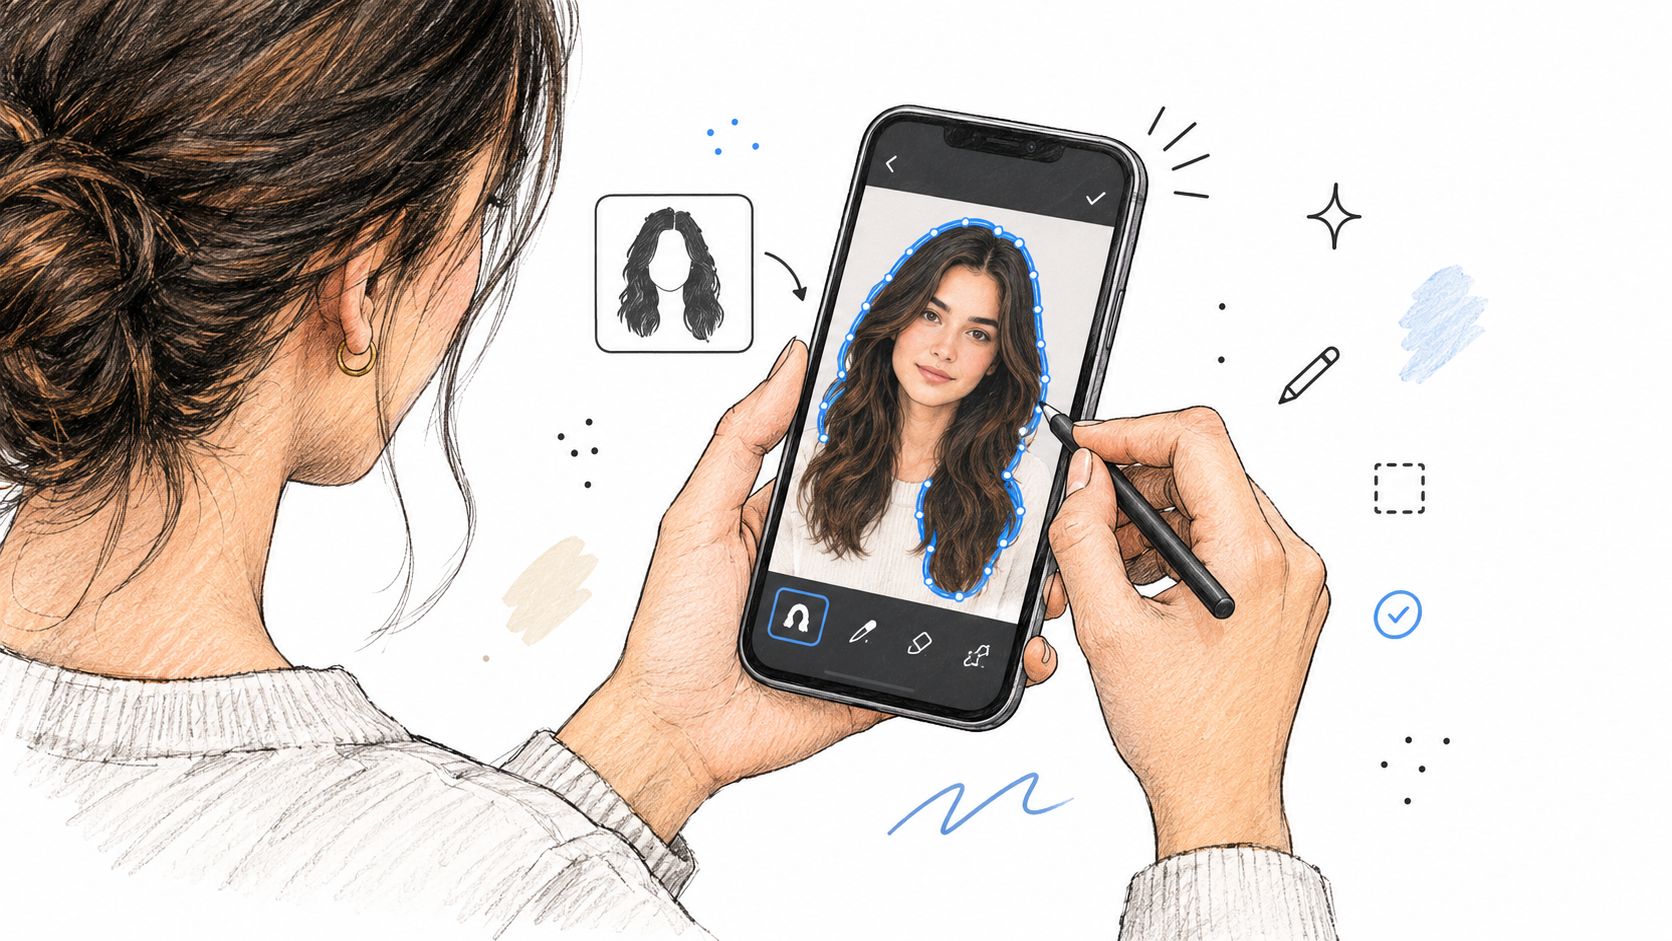
Open the image in the Edit tool and select the brush or masking control. Work at a comfortable zoom level, then mark the area where new hair should appear. If you're filling a thinning crown, mask the crown rather than the entire head. If you're softening a receding hairline, follow the existing curve instead of drawing a straight replacement edge.
Keep the forehead, eyebrows, ears, jawline, and eyes outside the main mask. Those features give the system identity and perspective cues. Covering them can produce an attractive hairstyle on a different-looking person.
Use a smaller brush around the temples and ears. A larger brush is useful for the center of a sparse crown, but it can easily swallow sideburns or create a new hair shape that ignores the original head structure. Leave a narrow overlap where the existing hair meets the skin. That overlap gives the editor enough texture and color context to build a softer transition instead of placing a hard border over the forehead.
Make the first generation conservative. A partial edit is easier to correct than a full replacement, particularly when the source already has useful side hair or a recognizable curl pattern.
After refining the mask, generate a first variation and inspect the result at full size. Pay attention to the roots, temples, ears, and any strands that cross onto the face. The editing workflow is easier to follow when the visual instructions and the live result stay separate, so use the walkthrough below as a reference before you start another pass.
If the hair is floating, reduce the masked area around the forehead and add language about fine root strands and a gradual transition. If the face has changed, undo the generation and protect more of the original portrait rather than trying to repair the identity with a stronger prompt.
“Blonde hair” describes color, not appearance. A useful prompt also tells the editor about structure, density, strand behavior, lighting, and the relationship between the hair and the face. Start with the desired shape, add texture, then specify how light should behave across the strands.
A reliable structure looks like this:
[hairstyle] + [texture and density] + [root transition] + [lighting] + [identity preservation]
Try these templates as starting points:
Negative prompts help remove predictable defects. Use language such as plastic hair, solid helmet, painted scalp, hard hairline, floating wig, melted strands, hair on cheeks, dark root band, and hair merging into clothing. Don't add every negative phrase automatically. Include the problems you see in the previous result, then regenerate.
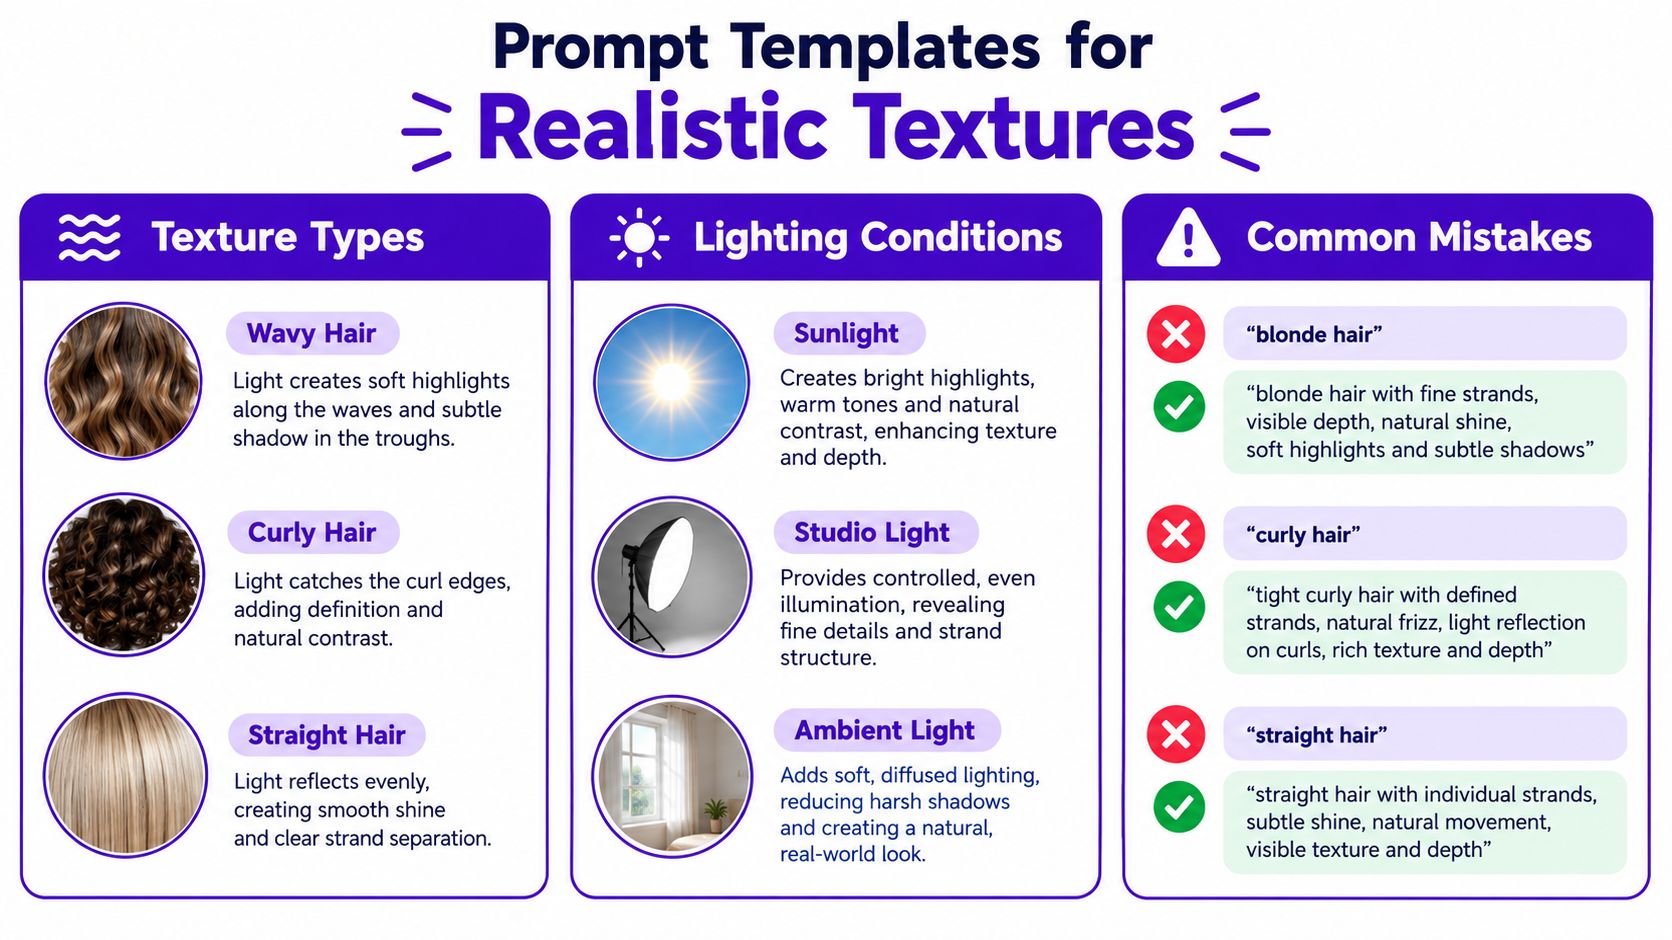
Hair looks believable when the highlights agree with the portrait. Use soft diffused shadows for a bright selfie, warm window light for a side-lit indoor photo, or subtle rim light when the original image has a visible edge highlight. If you request glossy editorial hair on a flat, shadowless selfie, the result may introduce highlights that have nowhere to come from.
The same principle applies to texture. “Sleek” should be paired with controlled strand direction and restrained shine. “Messy” should include irregular flyaways and varied strand lengths, not random hair across the face. This beginner guide to prompt engineering offers a useful foundation for turning broad creative intentions into more specific instructions.
Adding volume over a bald or thinning area is harder than replacing a complete hairstyle. A full swap can hide the original boundary. Restoration has to respect the existing side hair, scalp visibility, facial proportions, and the direction in which the remaining strands grow.
Use a small, localized mask for a receding hairline. Follow the natural curve of the forehead and include a little of the existing hair behind it. For a thinning crown, expand the mask gradually from the center of the sparse area. Don't cover the dense side hair unless you're deliberately changing its texture or length.
A floating edge usually means the mask is too clean or the prompt doesn't describe a root transition. Add “fine baby hairs,” “soft irregular hairline,” and “gradual blending into forehead texture.” A dark stripe at the roots often comes from excessive density or dramatic lighting language. Remove terms such as “deep shadow” and replace them with “subtle root shading.”
Strands on the cheeks indicate that the generation has too much freedom around the face. Tighten the mask near the temples, preserve the cheek area, and add “no hair crossing the face.” If the generated hair looks pasted onto the head, lower the generation strength or choose a variation that changes less of the original image. The objective is integration, not maximum transformation.
The best restoration edit is often the least dramatic one. It adds density where the eye expects it, while leaving the subject's existing hair pattern intact.
A technical benchmark reinforces why boundary control matters. The K-Hairstyle dataset contains 500,000 high-resolution images and evaluates hair dyeing, reference-based hairstyle transfer, and hairstyle classification. Its reported transfer result includes an average score of 14.67 across male and female transfer domains. The K-Hairstyle research paper also highlights the importance of separating the face and hair boundary and evaluating different target domains independently.
For readers comparing cosmetic editing with non-surgical hair restoration topics, this receding hairline guide from PRP For HairLoss provides useful context about the concern itself. An AI edit can visualize a fuller hairline, but it doesn't change physical hair growth, density, or scalp condition.
A hairstyle edit becomes a production problem when the image is part of a series. An indie author may need the same character to appear on a cover and promotional posts. An Etsy seller may want several product portraits with consistent facial features. A social media team may need a recognizable avatar across different outfits and backgrounds.
Preserve identity by treating the face as locked content. Mask only the hair region, keep the eyes, nose, mouth, jaw, and ears untouched, and use the same source portrait when creating variations. If you need multiple views, generate them from a consistent character reference rather than asking each image to invent the face again.
Write down the elements that shouldn't change:
Then vary one element at a time. Generate the hairstyle first, review the hairline, and only afterward test color or length. Changing all variables together makes it difficult to identify whether a face shift came from the mask, the prompt, or the lighting request.
Commercial use also requires a rights check. Don't assume that a generated image is automatically suitable for a book cover, product listing, paid advertisement, or merchandise. Review the current terms for the specific plan and workflow you're using, and keep records of the source photo, prompt, and final export. The commercial use rights information is a sensible place to check before publishing or selling an asset.
For repeatable work, save a master prompt and a clean, unedited source portrait. That gives you a stable reference when a later variation changes the face or introduces an unwanted root shadow.
Keep this checklist beside the editor while you work. It prevents the common mistake of trying to fix a masking problem with increasingly elaborate prompts.
If the first generation fails, don't enter an endless loop of random prompts. Undo it, inspect the exact failure, and make one controlled correction. A tighter mask fixes misplaced hair. More specific texture and lighting language fixes lifeless strands. A protected face fixes identity drift.
Use starryai to upload a portrait, edit a targeted hair area, and test prompt-led hairstyles, textures, and color changes without rebuilding the whole image. Start with a well-lit selfie and a conservative mask, then create a few focused variations until the hairline blends naturally enough for the project you're making.


.svg)